English
English
If an app uses a third-party or social login service (e.g., Facebook login, Google login, Twitter login, LinkedIn login, Amazon login, or WeChat login) to set up or authenticate users of the app, as required by Apple's review guidelines primary account, the app must also offer "Sign in with Apple" as an equivalent option. For details, please refer to: App Store Review Guidelines - Sign in with Apple
HBuilderX 2.4.7+ version newly supports
Sign in with Apple, Apple sign in is a newly added feature of iOS13, when your application uses a third-party login such as WeChat login, you also need to integrate Apple Login, otherwise submitting AppStore review will be rejected
# 开通
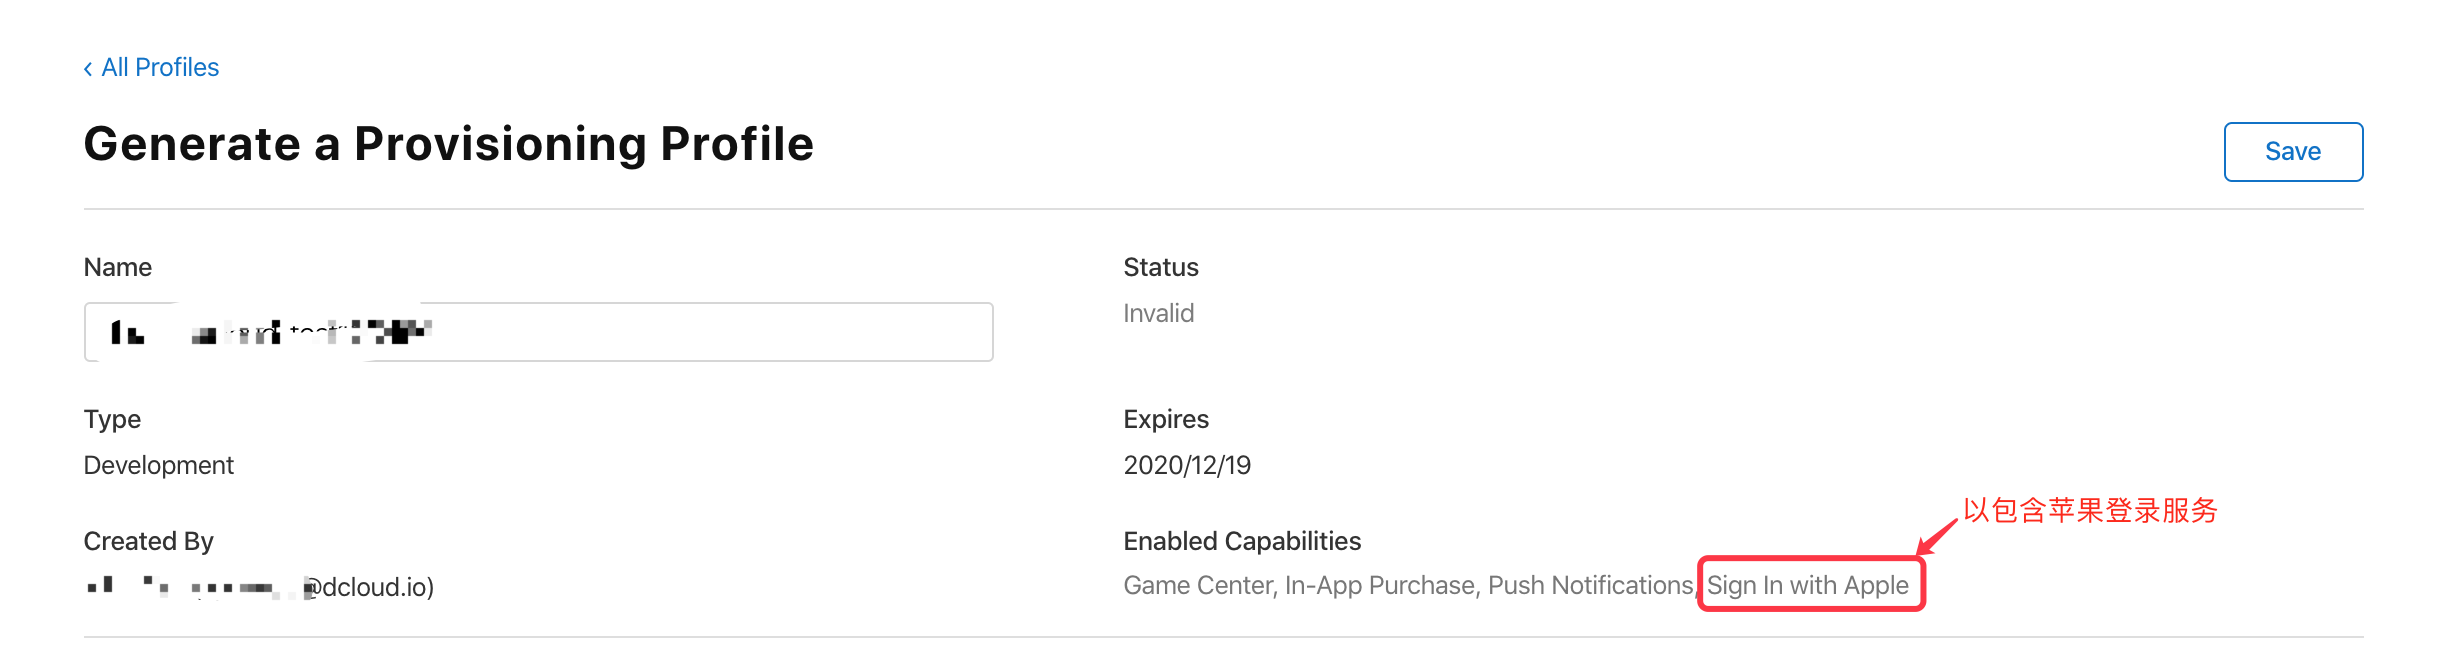
To log in with Apple, you first need to enable the Sign In with Apple service of the App in the Apple developer background:
- 登录到苹果开发者后台
- 在Identifiers页面选择应用的 App ID(Bundle ID)进入编辑
Capabilities界面,勾选Sign In with Apple服务并保存

- 修改
Sign In with Apple配置后需要到 Profiles 更新 profile 描述文件(不需要新建),点击 Edit 重新编辑对应的 profile 文件,然后下载保存使用新的 profile 文件即可
Note: Only apps published in the Appstore can use Apple login. The enterprise version of the developer account does not support
Sign In with Apple(the enterprise version of the developer account refers to the account used to distribute apps within the enterprise and cannot be used to publish the App Store, that is, the account with the price of 299$)
# 配置
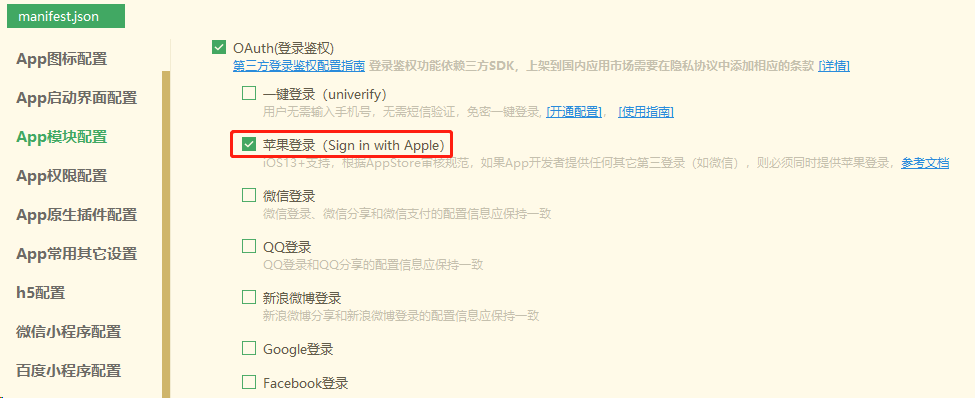
Notice
- The standard real machine running base in HBuilderX uses enterprise certificate signature, which does not support
Sign In with Apple - After configuration, the cloud package must be submitted to take effect. Please use the [custom debugging base] when the real machine is running (https://ask.dcloud.net.cn/article/35115)
# 使用苹果登录
- uni-app项目
调用 uni.login(OBJECT) 发起授权登录,,调用 uni.getUserInfo(OBJECT) 获取用户信息,OBJECT参数中provider属性值固定为
apple - 5+ App项目 调用 plus.oauth.getServices(successCB,errorCB) 获取登录服务对象 plus.oauth.AuthService, 再调用其 login 方法进行登录授权
# 登录按钮样式
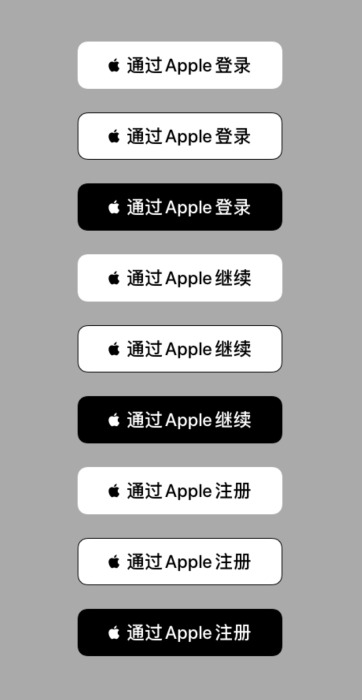
Apple has requirements for the style of the login button, please set the style of the login button uniformly according to Apple's requirements, otherwise the review may be rejected, pay attention to the following:
- Buttons must be prominently located (avoid swiping the screen to see)
- The login button has three appearances: white, white with black outline and black, other designs may affect the review;
- There are also requirements for the rounded corner range of the button and the minimum size of the button;
- For specific rules, please refer to Apple's official document
# 示例代码
注:因为是 iOS13+ 系统才支持苹果登录,所以建议在App的界面入口判断下,只有 iOS13 才显示Apple登录的选项
- uni-app项目
uni.login({
    provider: 'apple',
    success: function (loginRes) {
        // login successful
        uni.getUserInfo({
            provider: 'apple',
            success: function(info) {
                // Obtain user information successfully, save login authentication data in info.authResult
            }
        })
    },
    fail: function (err) {
        // 登录授权失败
        // err.code error code refer to `authorization failure error code (code) description`
    }
});
- 5+ App项目
var appleOauth = null;
plus.oauth.getServices(function(services) {
	for (var i in services) {
		var service = services[i];
		// 获取苹果授权登录对象,苹果授权登录id 为 'apple' iOS13以下系统,不会返回苹果登录对应的 service
		if (service.id == 'apple') {
			appleOauth = service;
			break;
		}
	}
	appleOauth.login( function(oauth){
		// Authorization succeeded
    // save generic authentication data in appleOauth.authResult
    // appleOauth.appleInfo saves the complete data of Apple login authentication, please refer to the description of `appleInfo`
	}, function(err) {
    // 登录授权失败
    // err.code is the error code
	}, {
		// 默认只会请求用户名字信息,如需请求用户邮箱信息,需要设置 scope: 'email'
		scope: 'email'
	})
}, function(err) {
	// Failed to get services
})
appleInfo
| property | type | description |
|---|---|---|
| user | String | Apple user unique identifier |
| state | String | Verification information state |
| String | Optional email shared by the user | |
| fullName | Object | Optional full name shared by the user |
| authorizationCode | String | Authentication data |
| identityToken | String | Web Token (JWT) |
| realUserStatus | Number | Identifies whether the user is a real person 0: The current platform does not support, ignore this value; 1: Unable to confirm; 2: The authenticity of the user is very high |
| scope | String | Return information scope |
fullName
| property | type | description |
|---|---|---|
| namePrefix | String | Name prefix, title, honorific |
| givenName | String | Name |
| middleName | String | middle name |
| familyName | String | Last name |
| nameSuffix | String | Name suffix, degree, honor |
| nickName | String | nickname |
Authorization failure error code (code) description
| code | Description |
|---|---|
| 1000 | Unknown error |
| 1001 | Cancel authorization |
| 1002 | Invalid return value |
| 1003 | Request not processed |
| 1004 | Authorization failed |
# Precautions
- The built-in pedestal is signed for the enterprise certificate and does not support Sign in with Apple. You need to submit a cloud package or make a custom pedestal for functional testing.
- 只有首次弹出登录授权框时才会有用户名及email的项(email需要配置 scope: 'email' ),并且用户可以删除或编辑用户名或隐藏用户邮箱,如果用户删除了用户名授权成功后fullname字段也会为空
- 授权成功后再次调用登录接口会先校验上次授权是否依然有效,如有效,直接回调成功并返回上次授权成功时的数据,注意,此校验不会校验identityToken是否过期,需要用户自行处理;如果想每次都弹出授权框获取新的identityToken等信息,需要先调用logout,然后在调用登录接口就会弹出授权框,注意这时授权框内不会在出现用户名及邮箱,登录成功后这两个字段会为空,需要拿到 authorizationCode,identityToken 后传给服务器,然后和苹果服务器验证可获取用户名称等信息,具体请自行查阅文档;如果想在授权框中再次出现用户名或邮箱。需要在 系统设置->AppleID->密码与安全性->使用Apple ID 的 App 里面取消授权,然后再调用登录接口