English
English
# Manufacturer push application creation configuration process
Table of contents
1. Huawei application creation and configuration process
1. Create an application
2. Create an app
3. Push configuration
4. Push configuration
2. Meizu application creation and configuration process
1. Create an application
2. Create an app
3. Push configuration
4. Push configuration
3. Xiaomi application creation and configuration process
1. Create an application
2. Create an app
3. Push configuration
4. Push configuration
4. OPPO application creation and configuration process
1. Create an application
2. Create an app
3. Push configuration
4. Push configuration
5. VIVO application creation configuration process
1. 创建应用
2. 推送配置
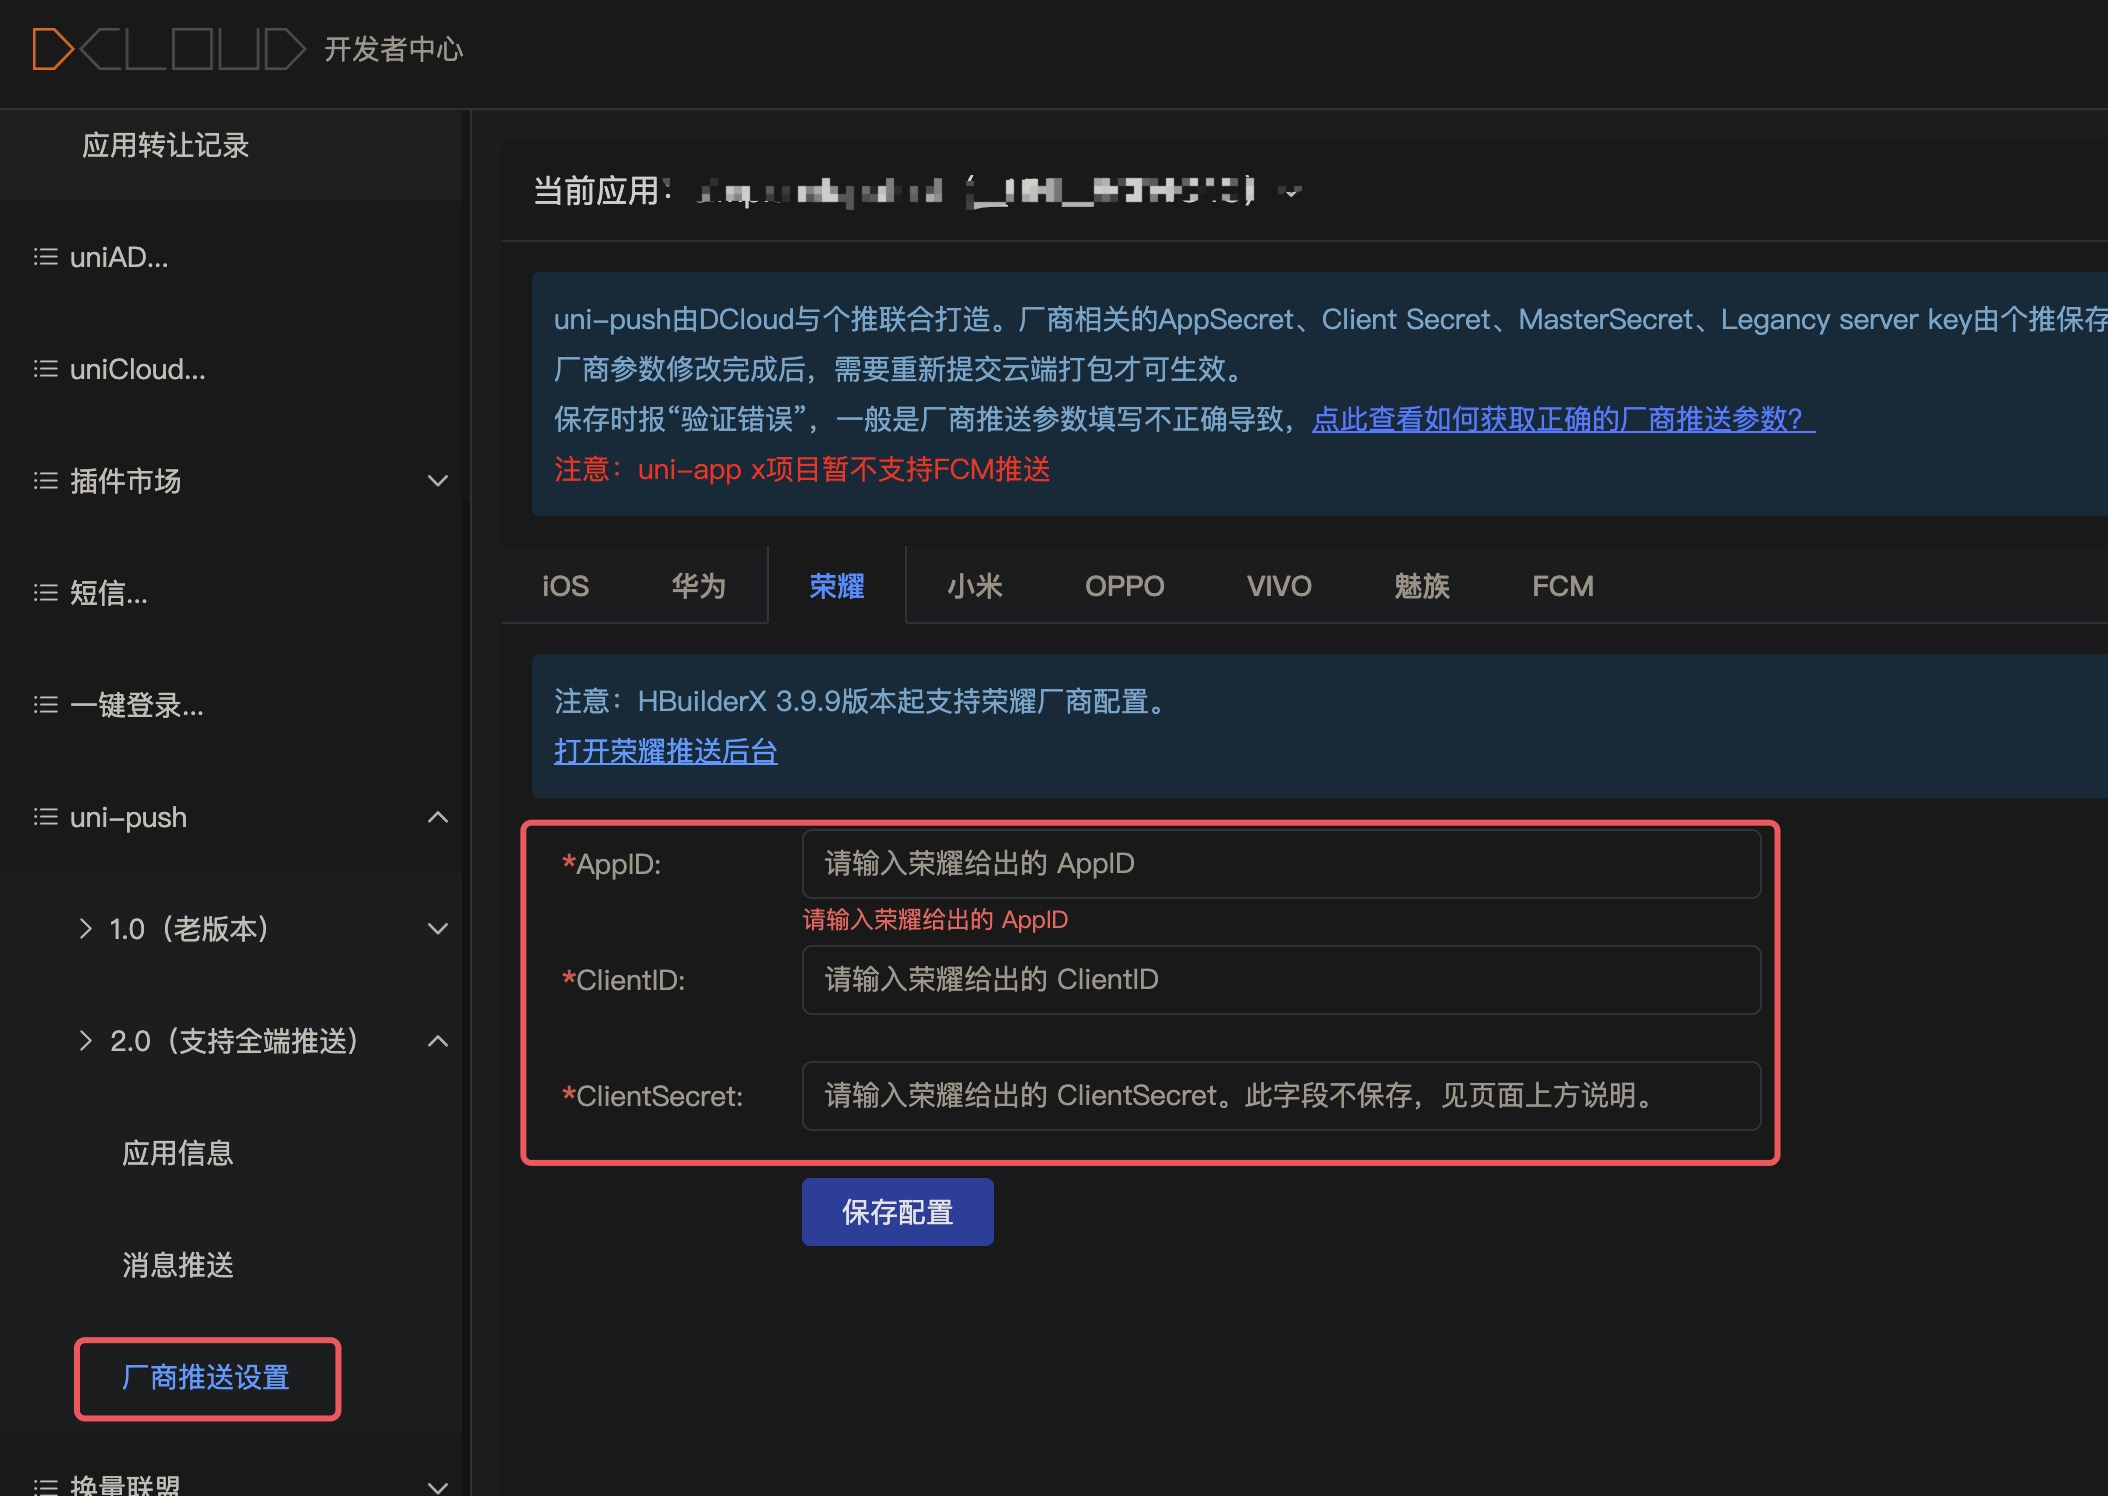
六、荣耀应用创建配置流程
1. 创建应用
2. 推送配置
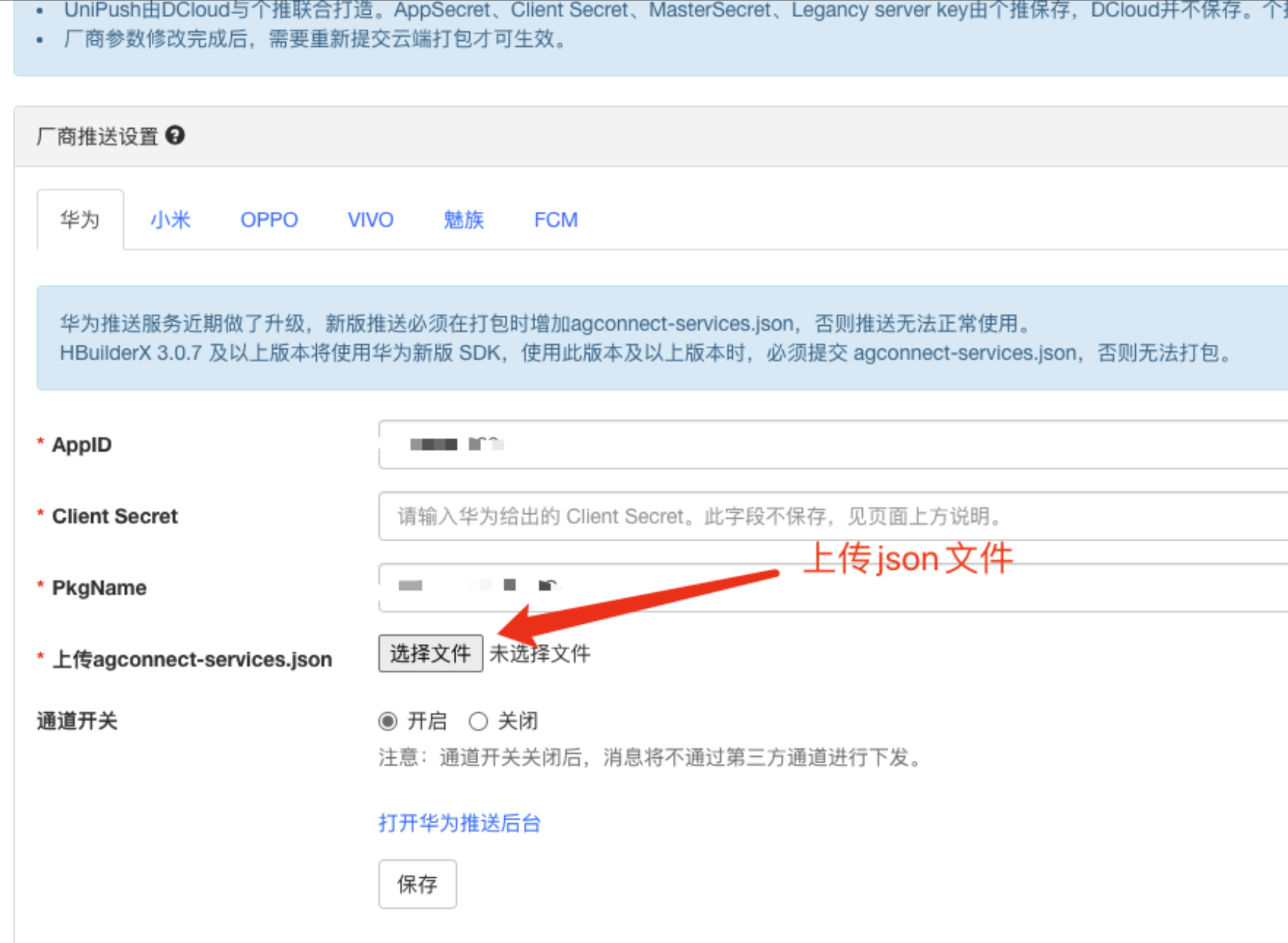
# 1. Huawei app creation and configuration process
# 1. Create an application
- 华为推送启用条件:华为rom且华为rom版本大于等于 emui4.1, 华为移动服务(可在应用列表或华为应用市场中查看)版本大于等于 2.6.3.301
- 参见华为官方文档 开发准备 章节。推送必须操作的步骤:1.1~1.6 小节(推送相关)
- 查看应用 AppID,SecretKey 登录 AppGallery Connect 网站,选择“我的应用”。打开刚才创建的应用,查看应用信息中相应的华为 AppID、华为 SecretKey。该信息在之后步骤中将会使用,如下图:

Select "Push Service" in "Project Settings > Growth", and click "Activate Now" to enable the Huawei side push service status.

在 “项目设置 > 常规” 中填写“ SHA256证书指纹 ”,点击右侧对勾进行保存;若不知道具体值,请参考 SHA256指纹证书获取。

Download the agconnect-services.json file for backup. as follows

Enable the project receipt status in "Project Settings > Push Service > Configuration", and configure the callback address and HTTPS certificate on the push side. as follows

Receipt name can be customized
Callback address (Hangzhou computer room)
https://thirdrcp-hz.getui.com/hw
# 2. Push configuration
- Fill in the Huawei AppID, Huawei AppSecret, and application package name in the developer center, and upload the json file you just saved. as follows
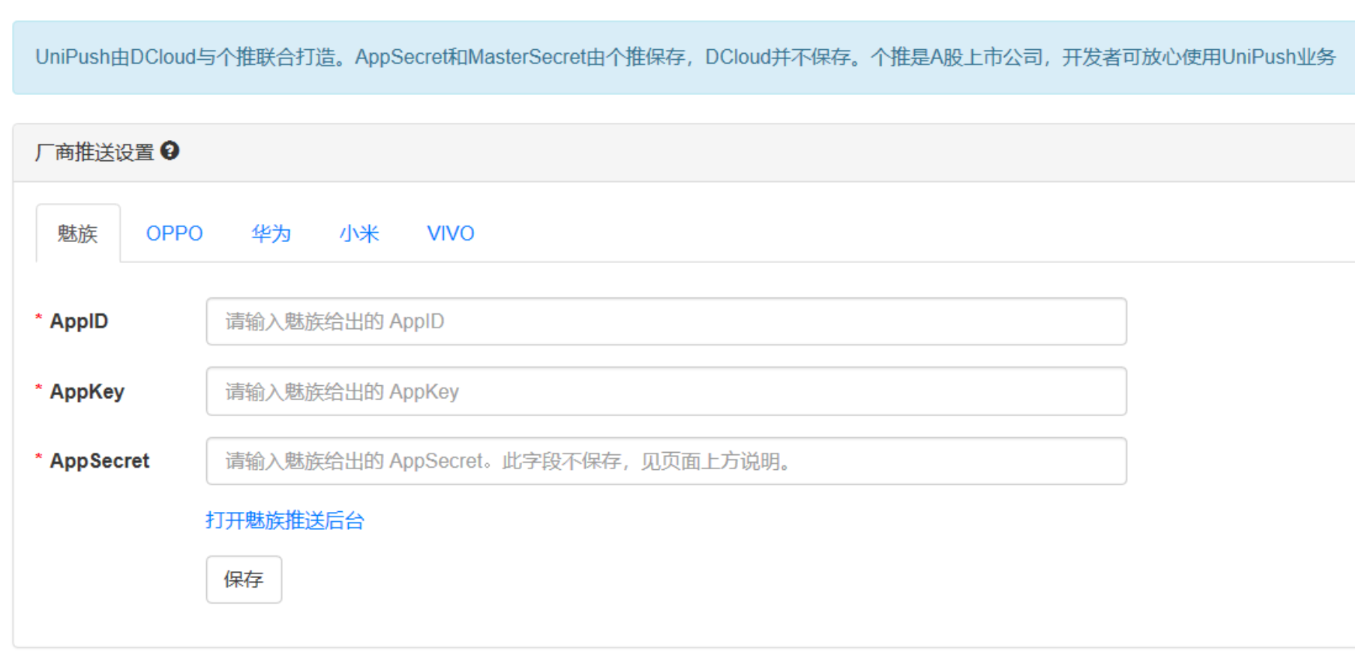
# 2. Meizu application creation and configuration process
# 1. Create an application
- Auxiliary push enabling conditions: Meizu rom and Meizu rom version is greater than or equal to 5.x
- Log in to Meizu Open Platform to apply for a developer account:

- Log in to Meizu Push Platform and select
New App:

- Fill in the
application nameandapplication package name, upload the application icon to create the application:

- Open the newly created app:

- View the corresponding Meizu AppID, Meizu AppKey, and Meizu AppSecret in
Configuration Management:

# 2. Push configuration
- Fill in the Meizu AppID, Meizu AppKey, and Meizu AppSecret in the developer center:
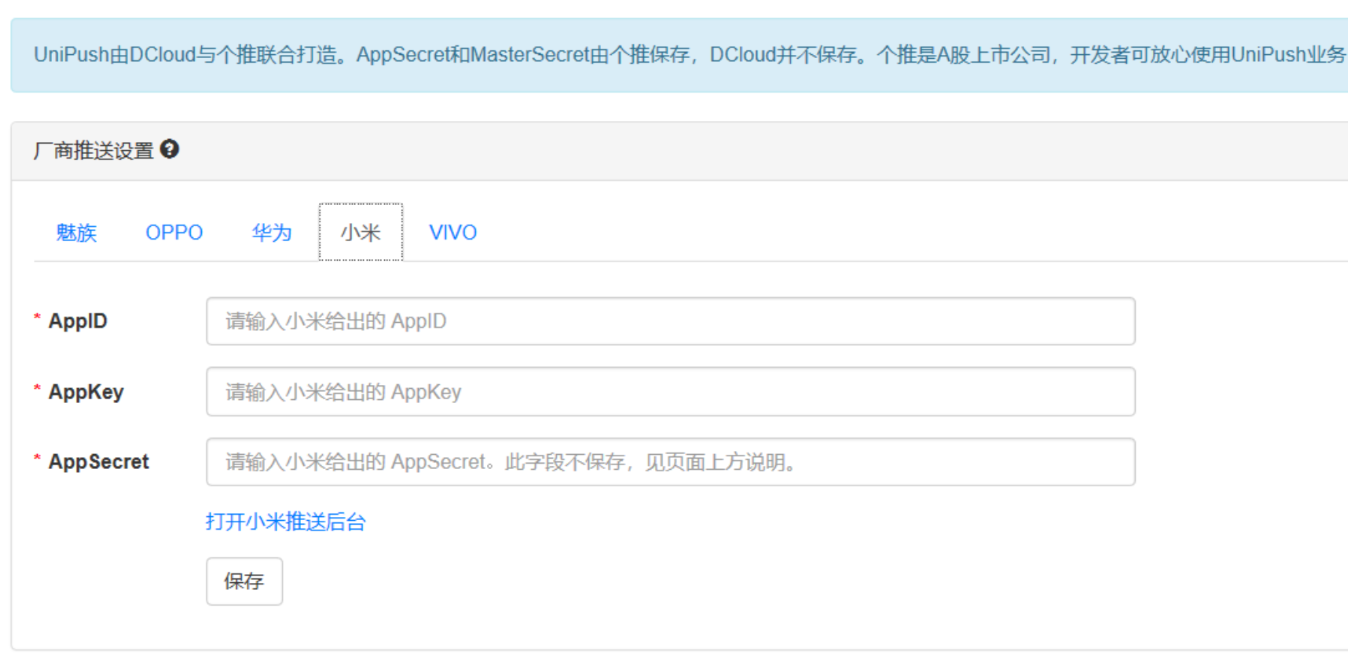
# 3. Xiaomi application creation and configuration process
# 1. Create an application
- Auxiliary push enabling conditions: Xiaomi rom and Xiaomi service framework (package name: com.xiaomi.xmsf) version number is greater than or equal to 105
- Log in to Xiaomi Open Platform to apply for a developer account:

- Enter
Management Console->Message Push:

- Select
Create mobile/tablet app:

Fill in
application nameandapplication package nameto create an application
Check the
I agree to accept the access cooperation agreement pushed by Xiaomicheckbox, and click theEnablebutton:

- View application information, get Xiaomi AppID, Xiaomi AppKey, Xiaomi AppSecret:

# 2. Push configuration
- Fill in the Xiaomi AppID and Xiaomi AppSecret in the developer center:
# Four, OPPO application creation configuration process
# 1. Create an application
- Auxiliary push enabling conditions: oppo colorOS rom and the version number is greater than or equal to 3.1
- Log in to OPPO Push Platform to log in/register an account:

- Select
Create Application:

Fill in
application nameandapplication package nameand uploadapplication iconto create an application
View app information, get OPPO App ID, OPPO App Key, OPPO App Secret, OPPO Master Secret

# 2. Push configuration
- Fill in the OPPO parameters in the developer center.

# Four, VIVO application creation configuration process
# 1. Create an application
- Assisted push enabling conditions: xplay6, x9 series, x9s, x20 series, Y79 series, y75 series, and subsequent versions will be supported by vivo. Specific reference https://dev.vivo.com.cn/documentCenter/doc/156
- Login VIVO Push Platform Login/register account:

- Select
Create Application:

Fill in
application nameandapplication package nameto create an application
View application information, get VIVO APP ID, VIVO APP keyy, VIVO APP secret

# 2. Push configuration
Fill in the VIVO parameters in the developer center.

# 五、 荣耀应用创建配置流程
# 1. 创建应用
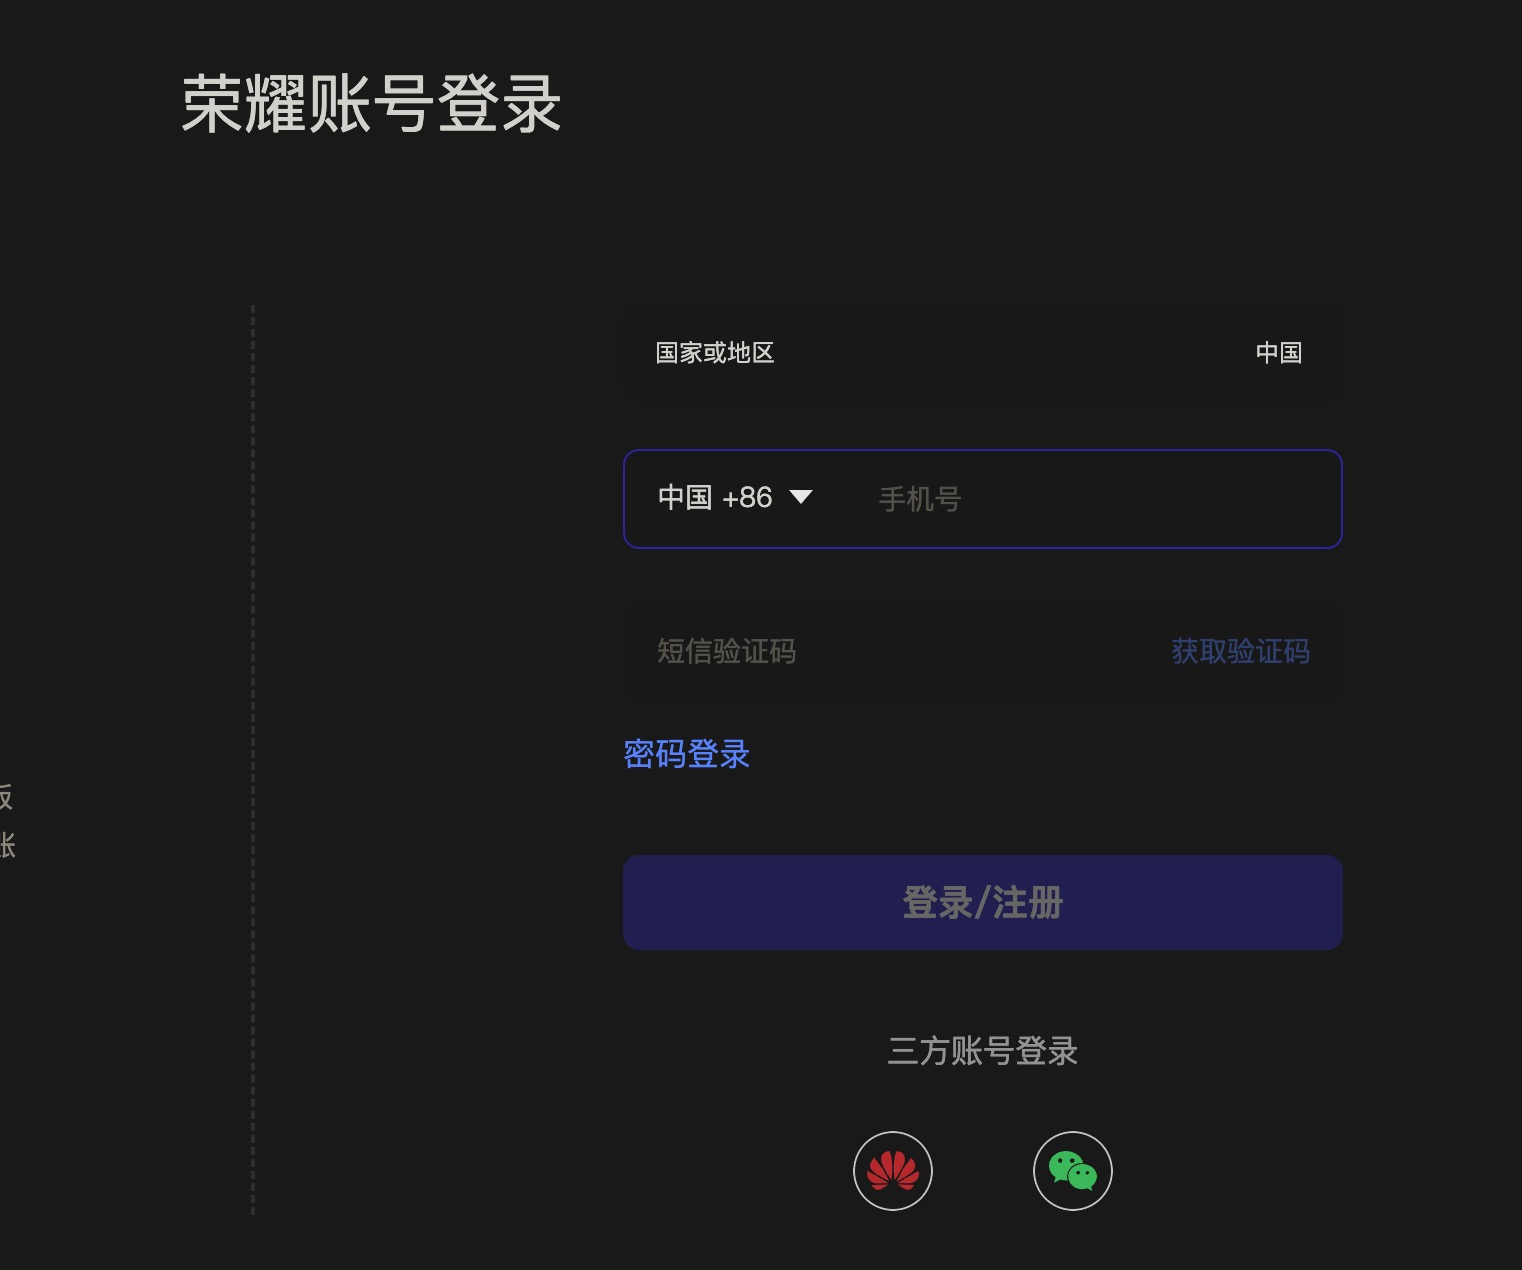
- 登录以后,点击管理中心,弹出的界面需要认证,此处选择
企业/组织开发者认证说明
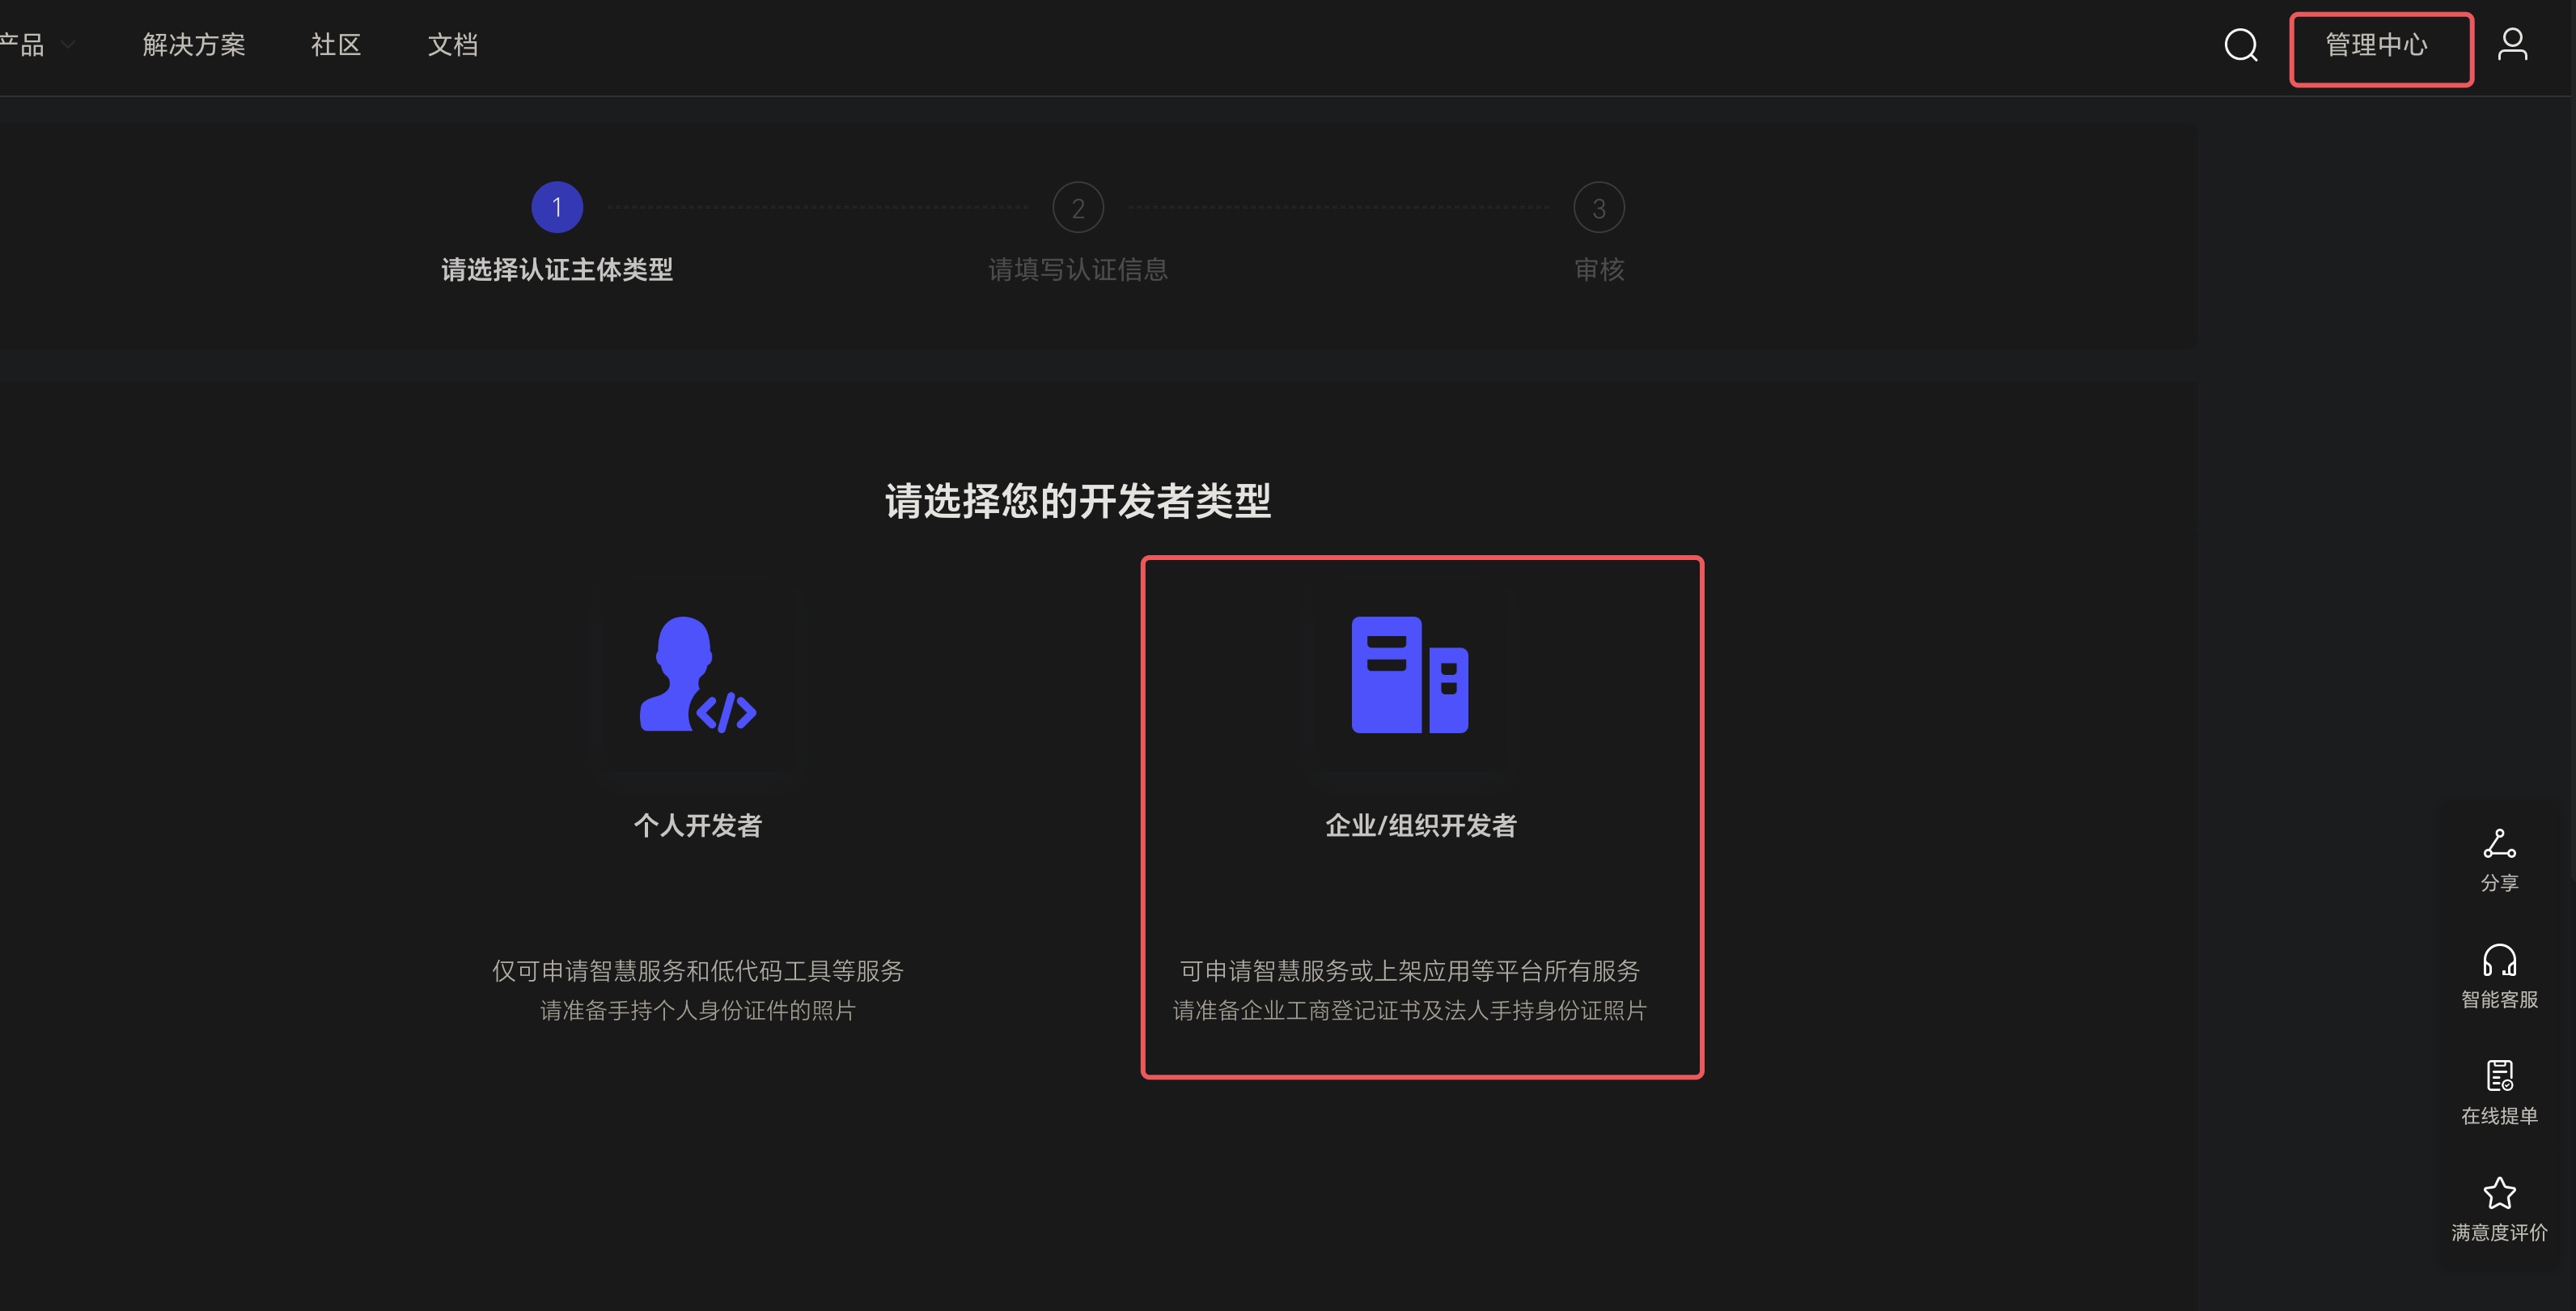
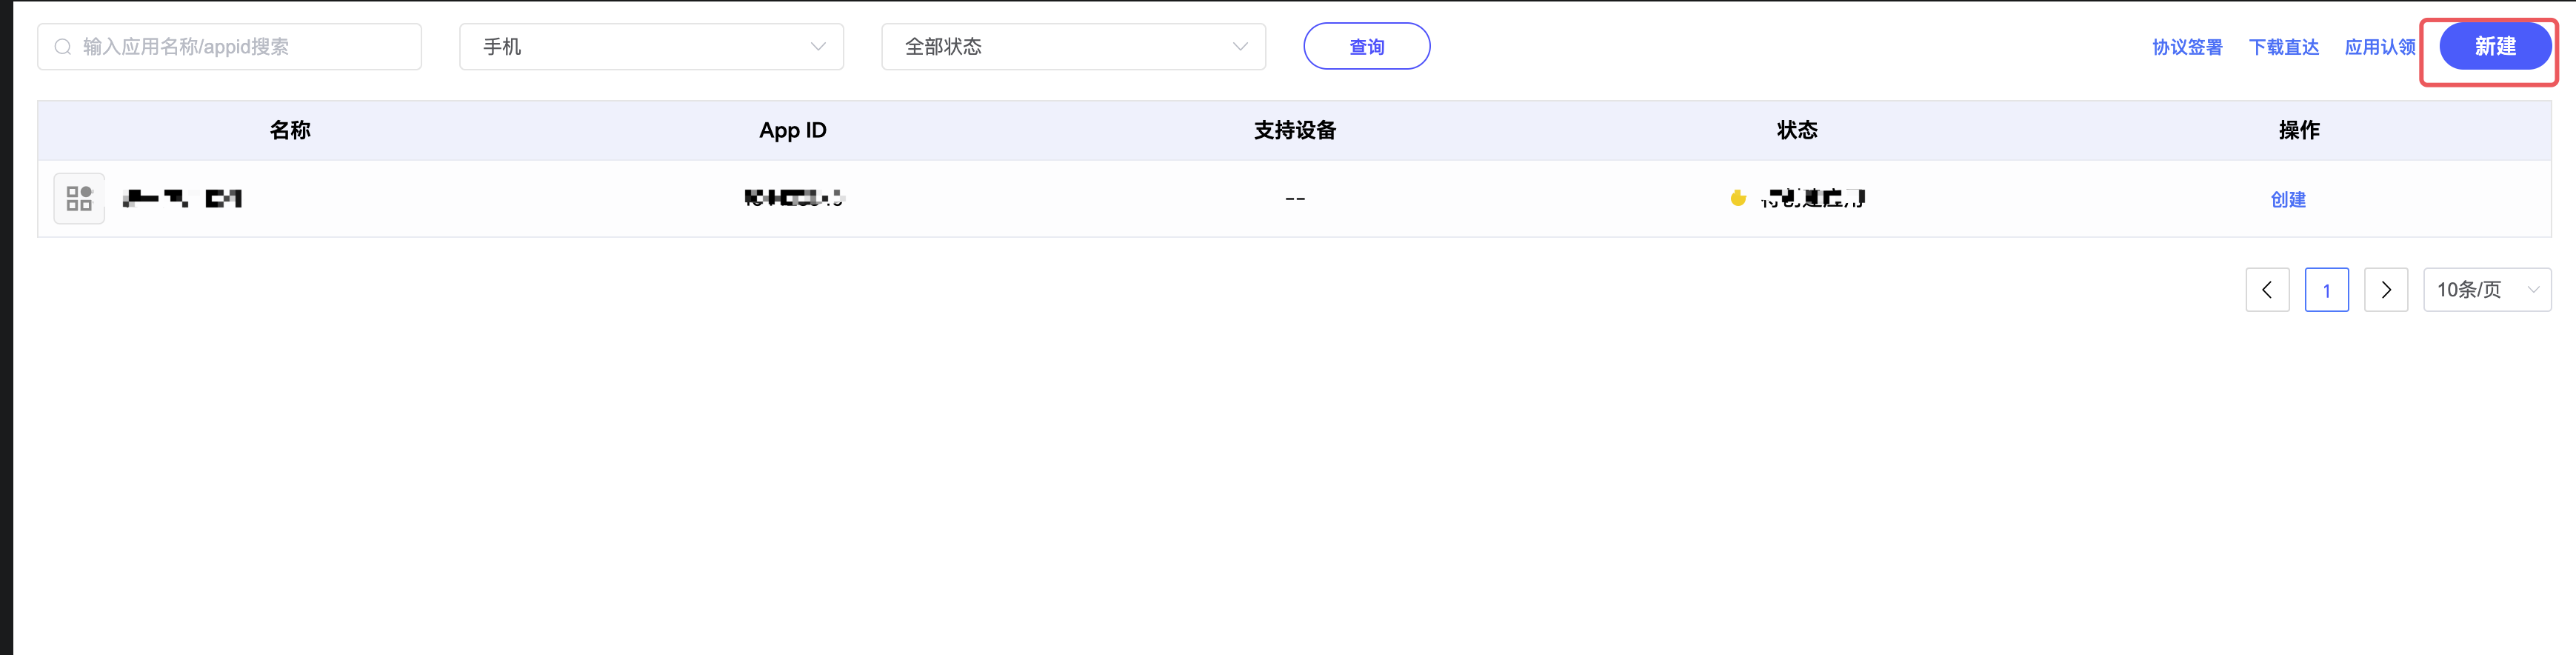
- 认证成功后,进入控制台,点击
应用服务->应用分发

- 创建应用,填写应用信息

- 应用创建完毕后,点击
应用服务->推送服务
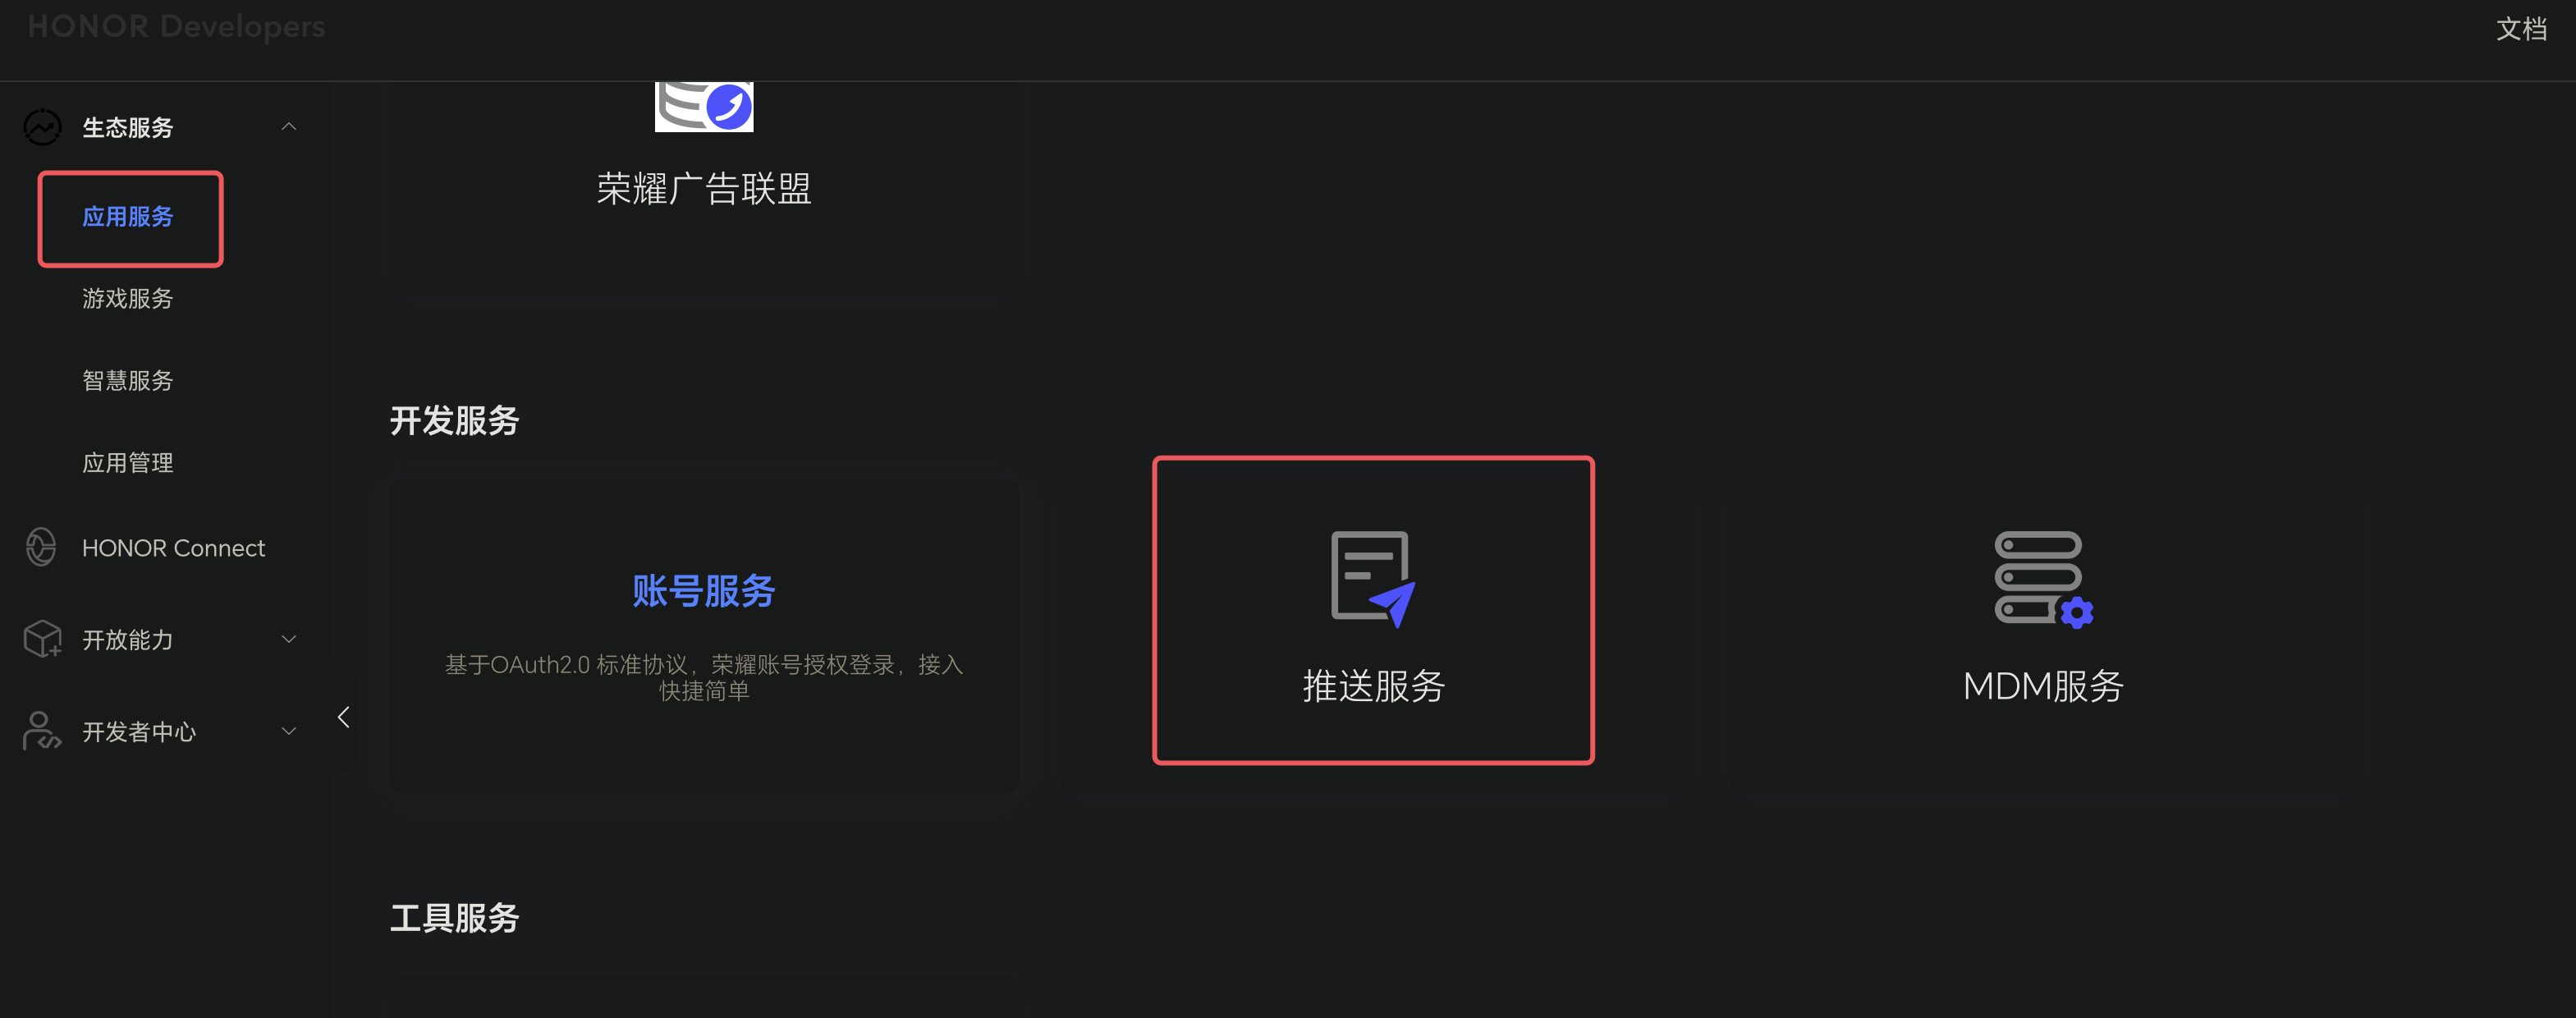
- 申请推送服务
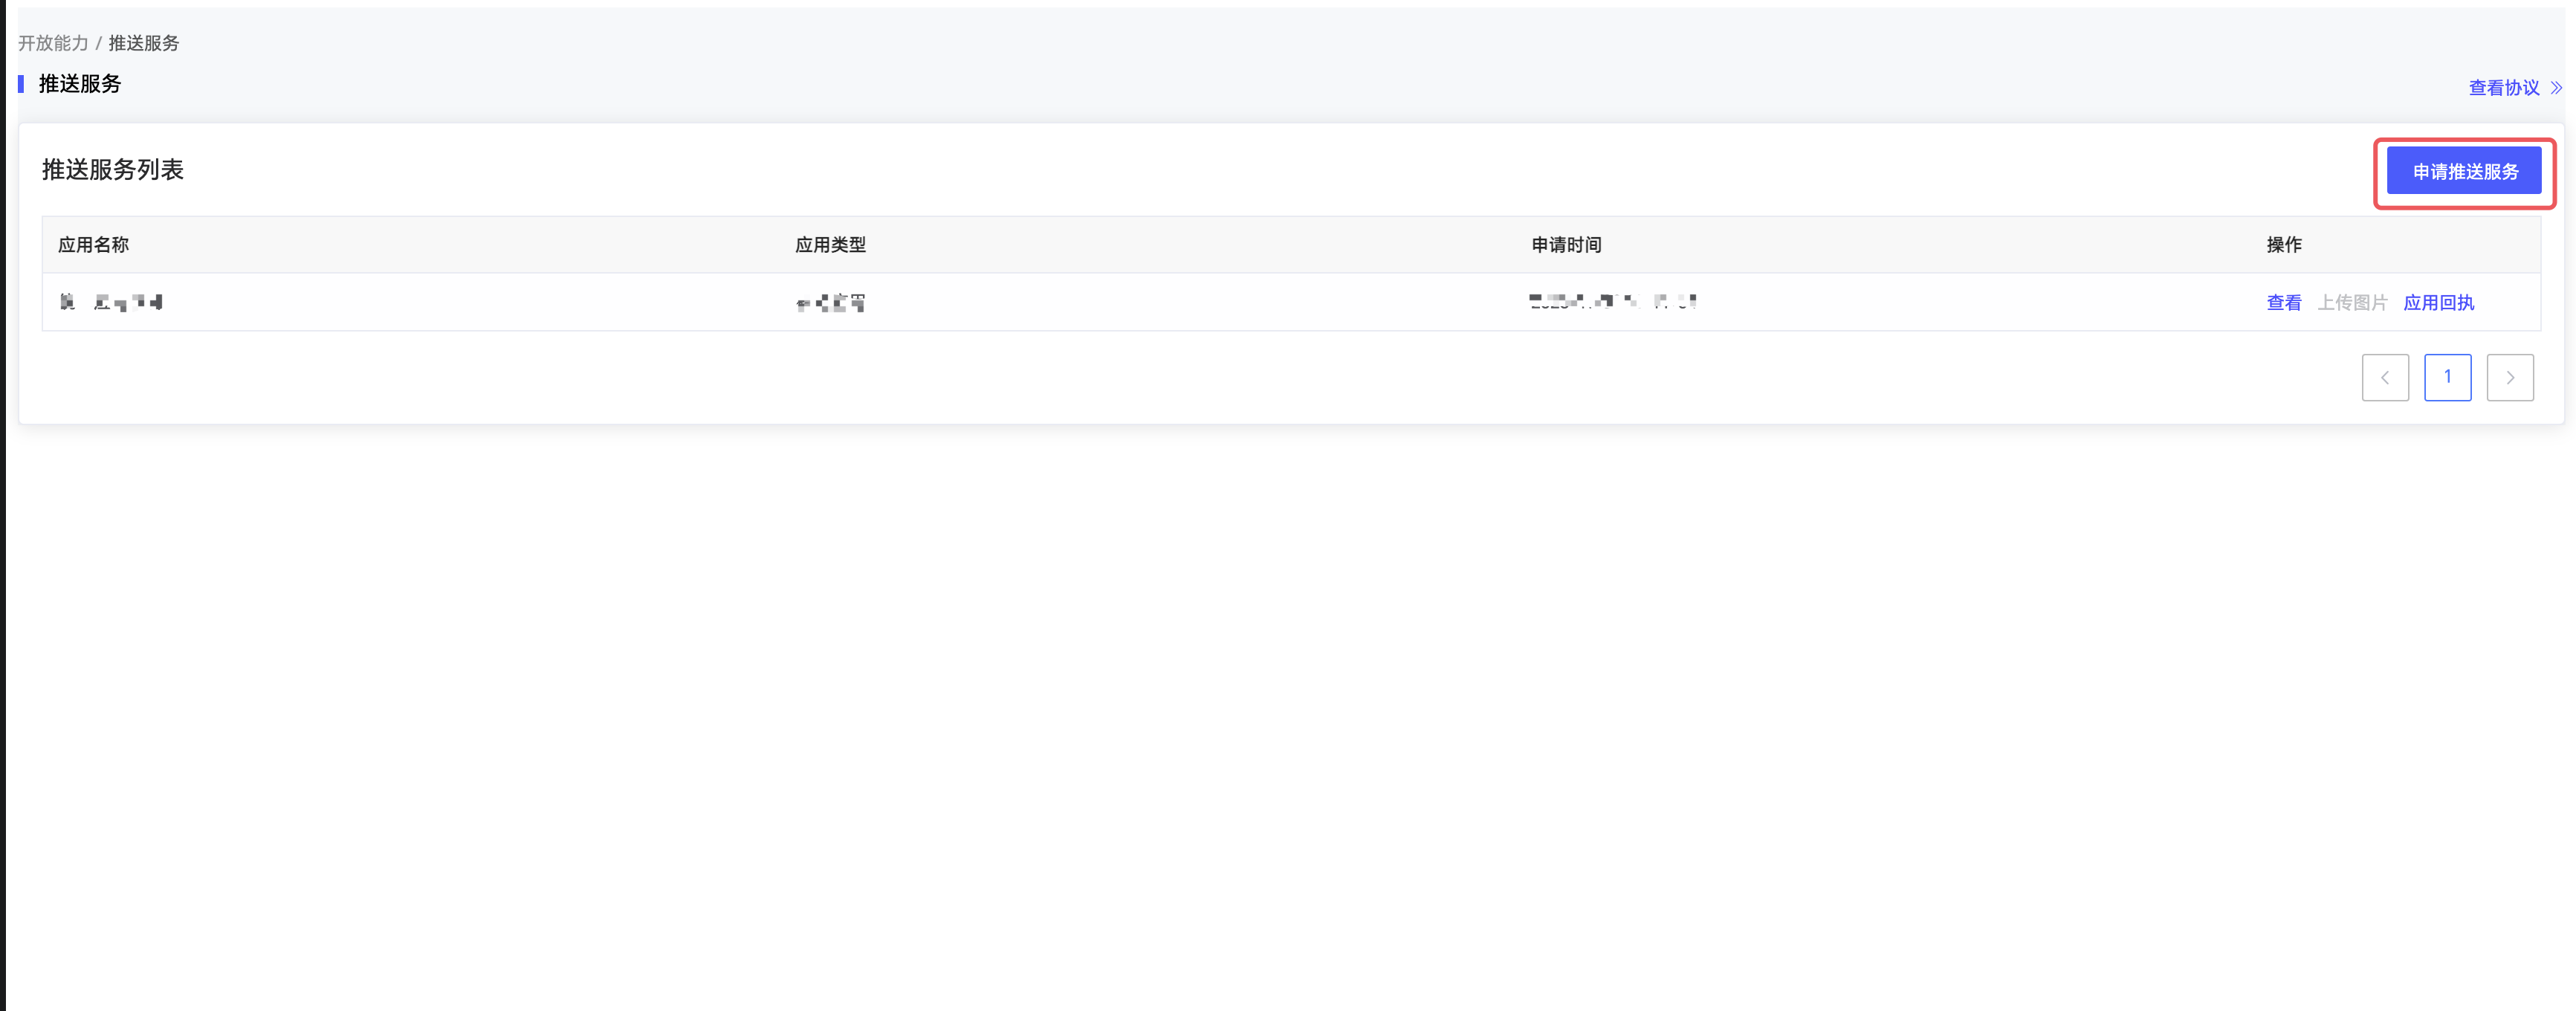
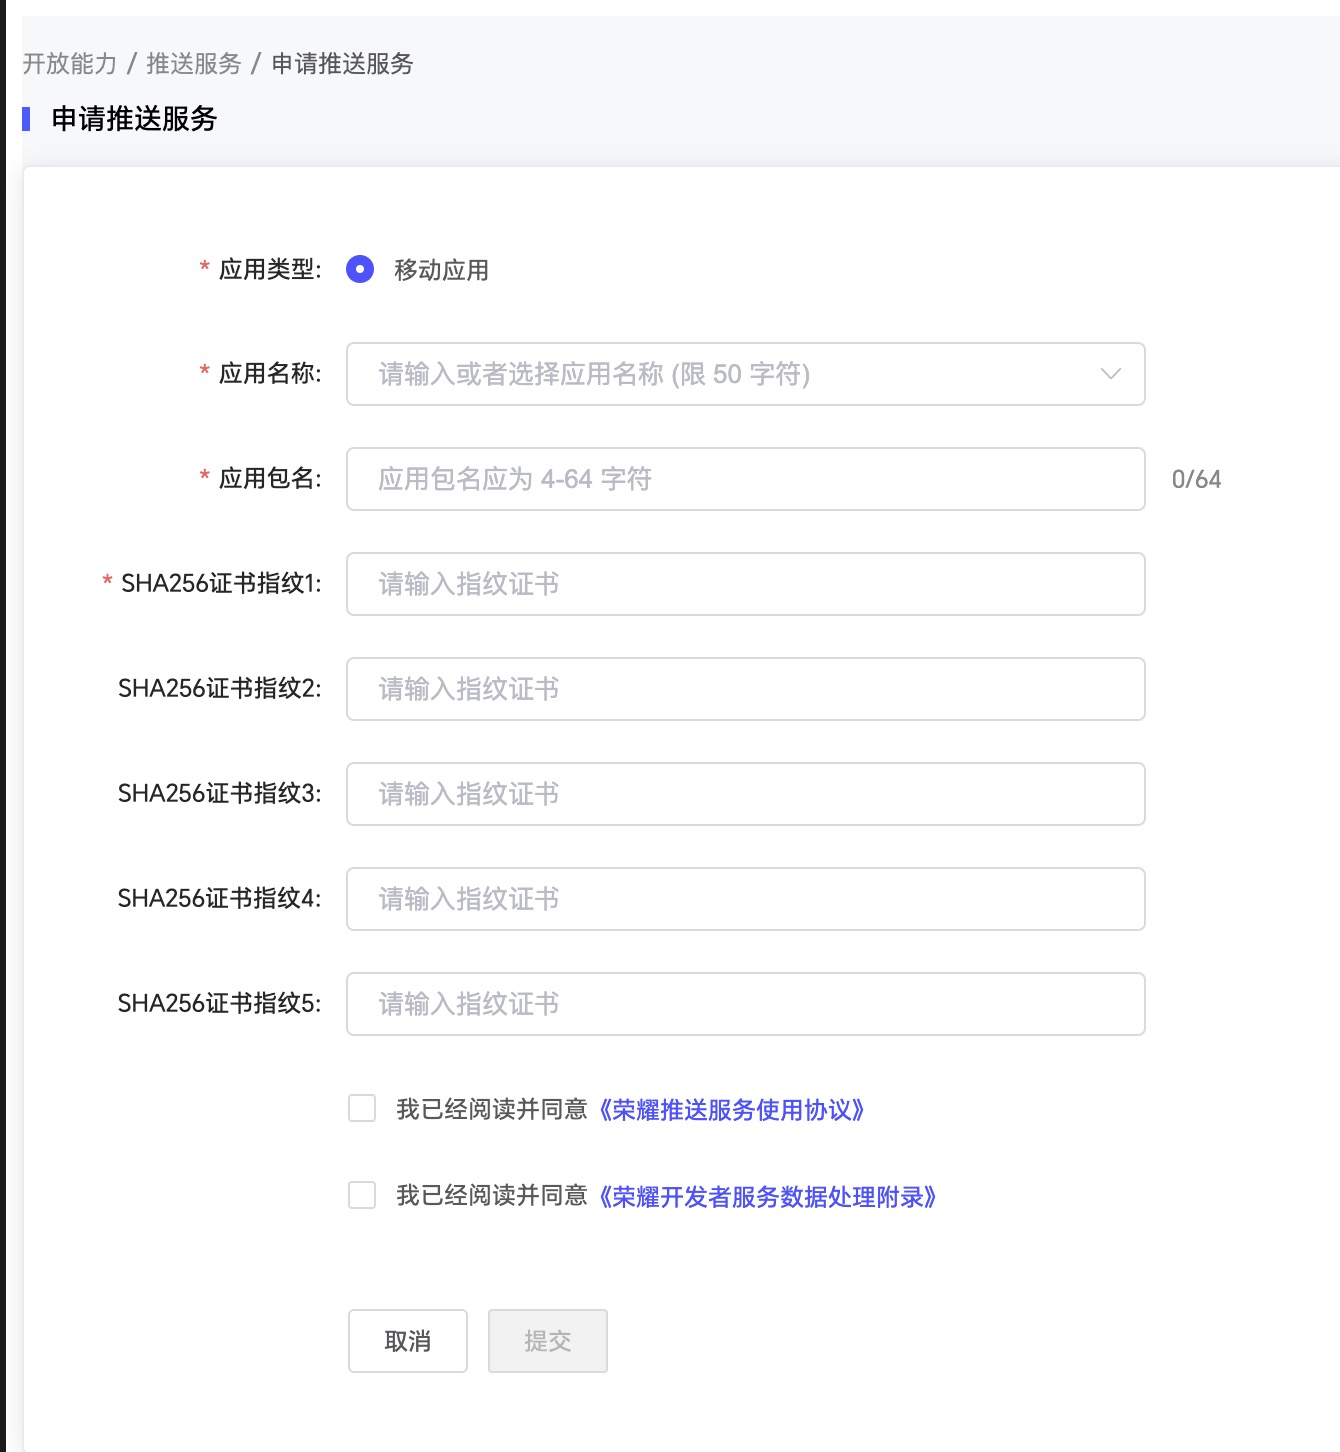
- 填写推送服务信息(应用名称要选刚刚创建的应用)
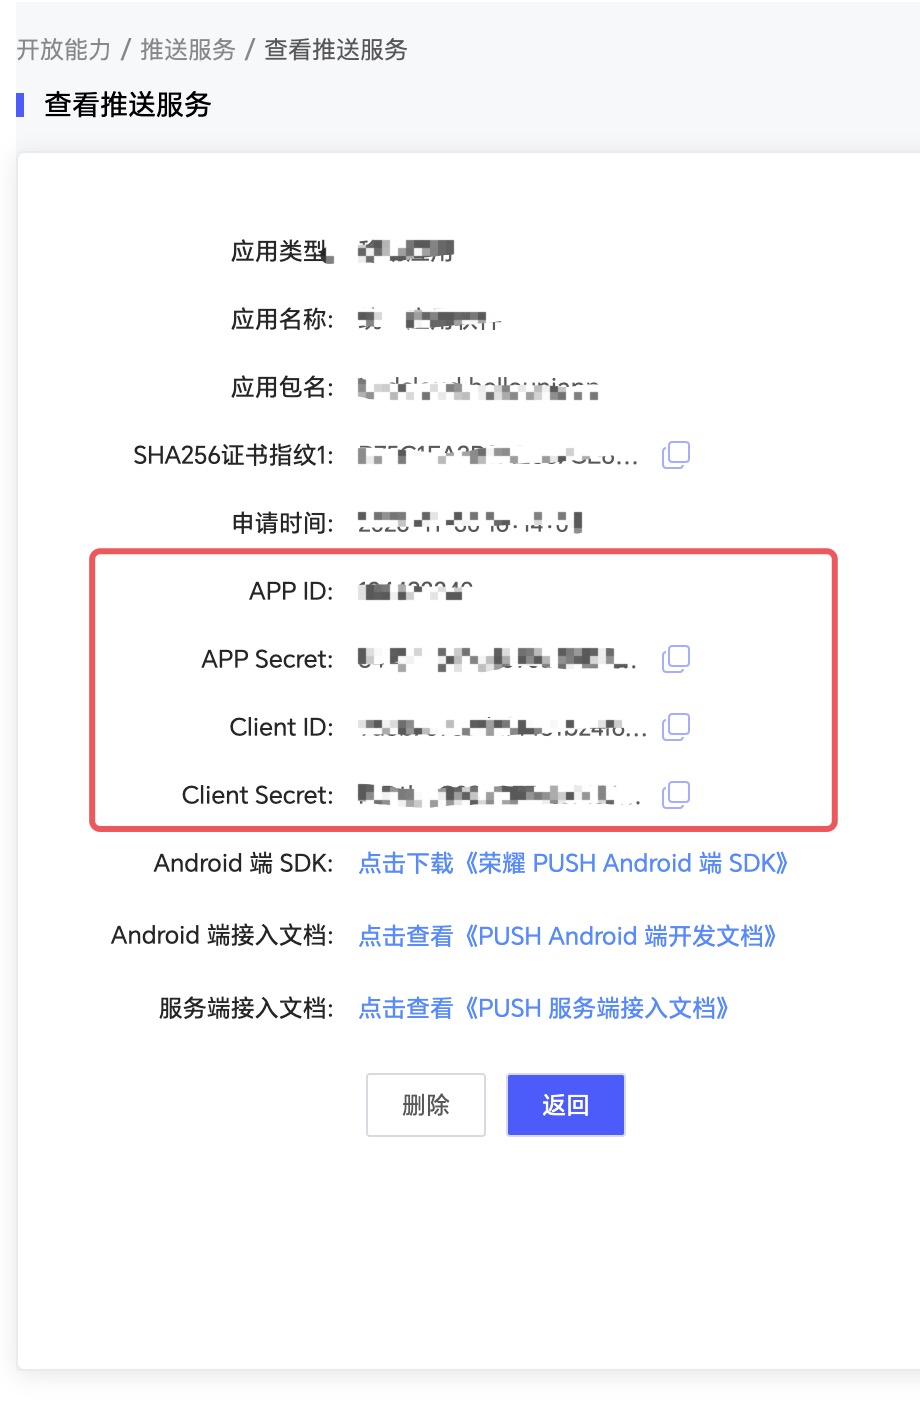
- 创建完成后,点击
查看,就可以得到荣耀推送的配置信息
# 2. 推送配置
- 在开发者中心中填写荣耀参数。