English
English
uni-appsupports quick project creation through the visual interface andvue-clicommand line.
The visualization method is relatively simple. HBuilderX has built-in related environment, which is out of the box and does not need to configure nodejs.
Before starting, developers need to download and install the following tools:
- HBuilderX: Official IDE download address
HBuilderX is a general front-end development tool, but it is specially enhanced for uni-app.
# Create uni-app
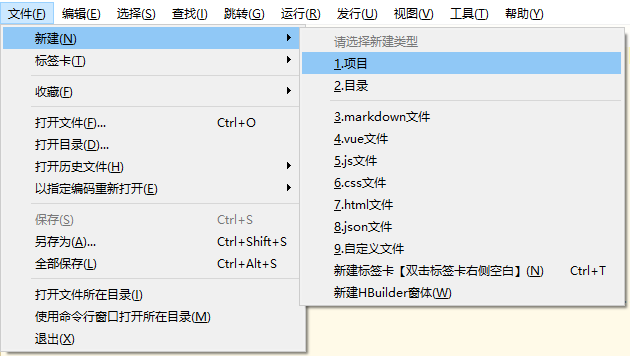
Click File -> New -> Project in the toolbar (shortcut Ctrl+N):
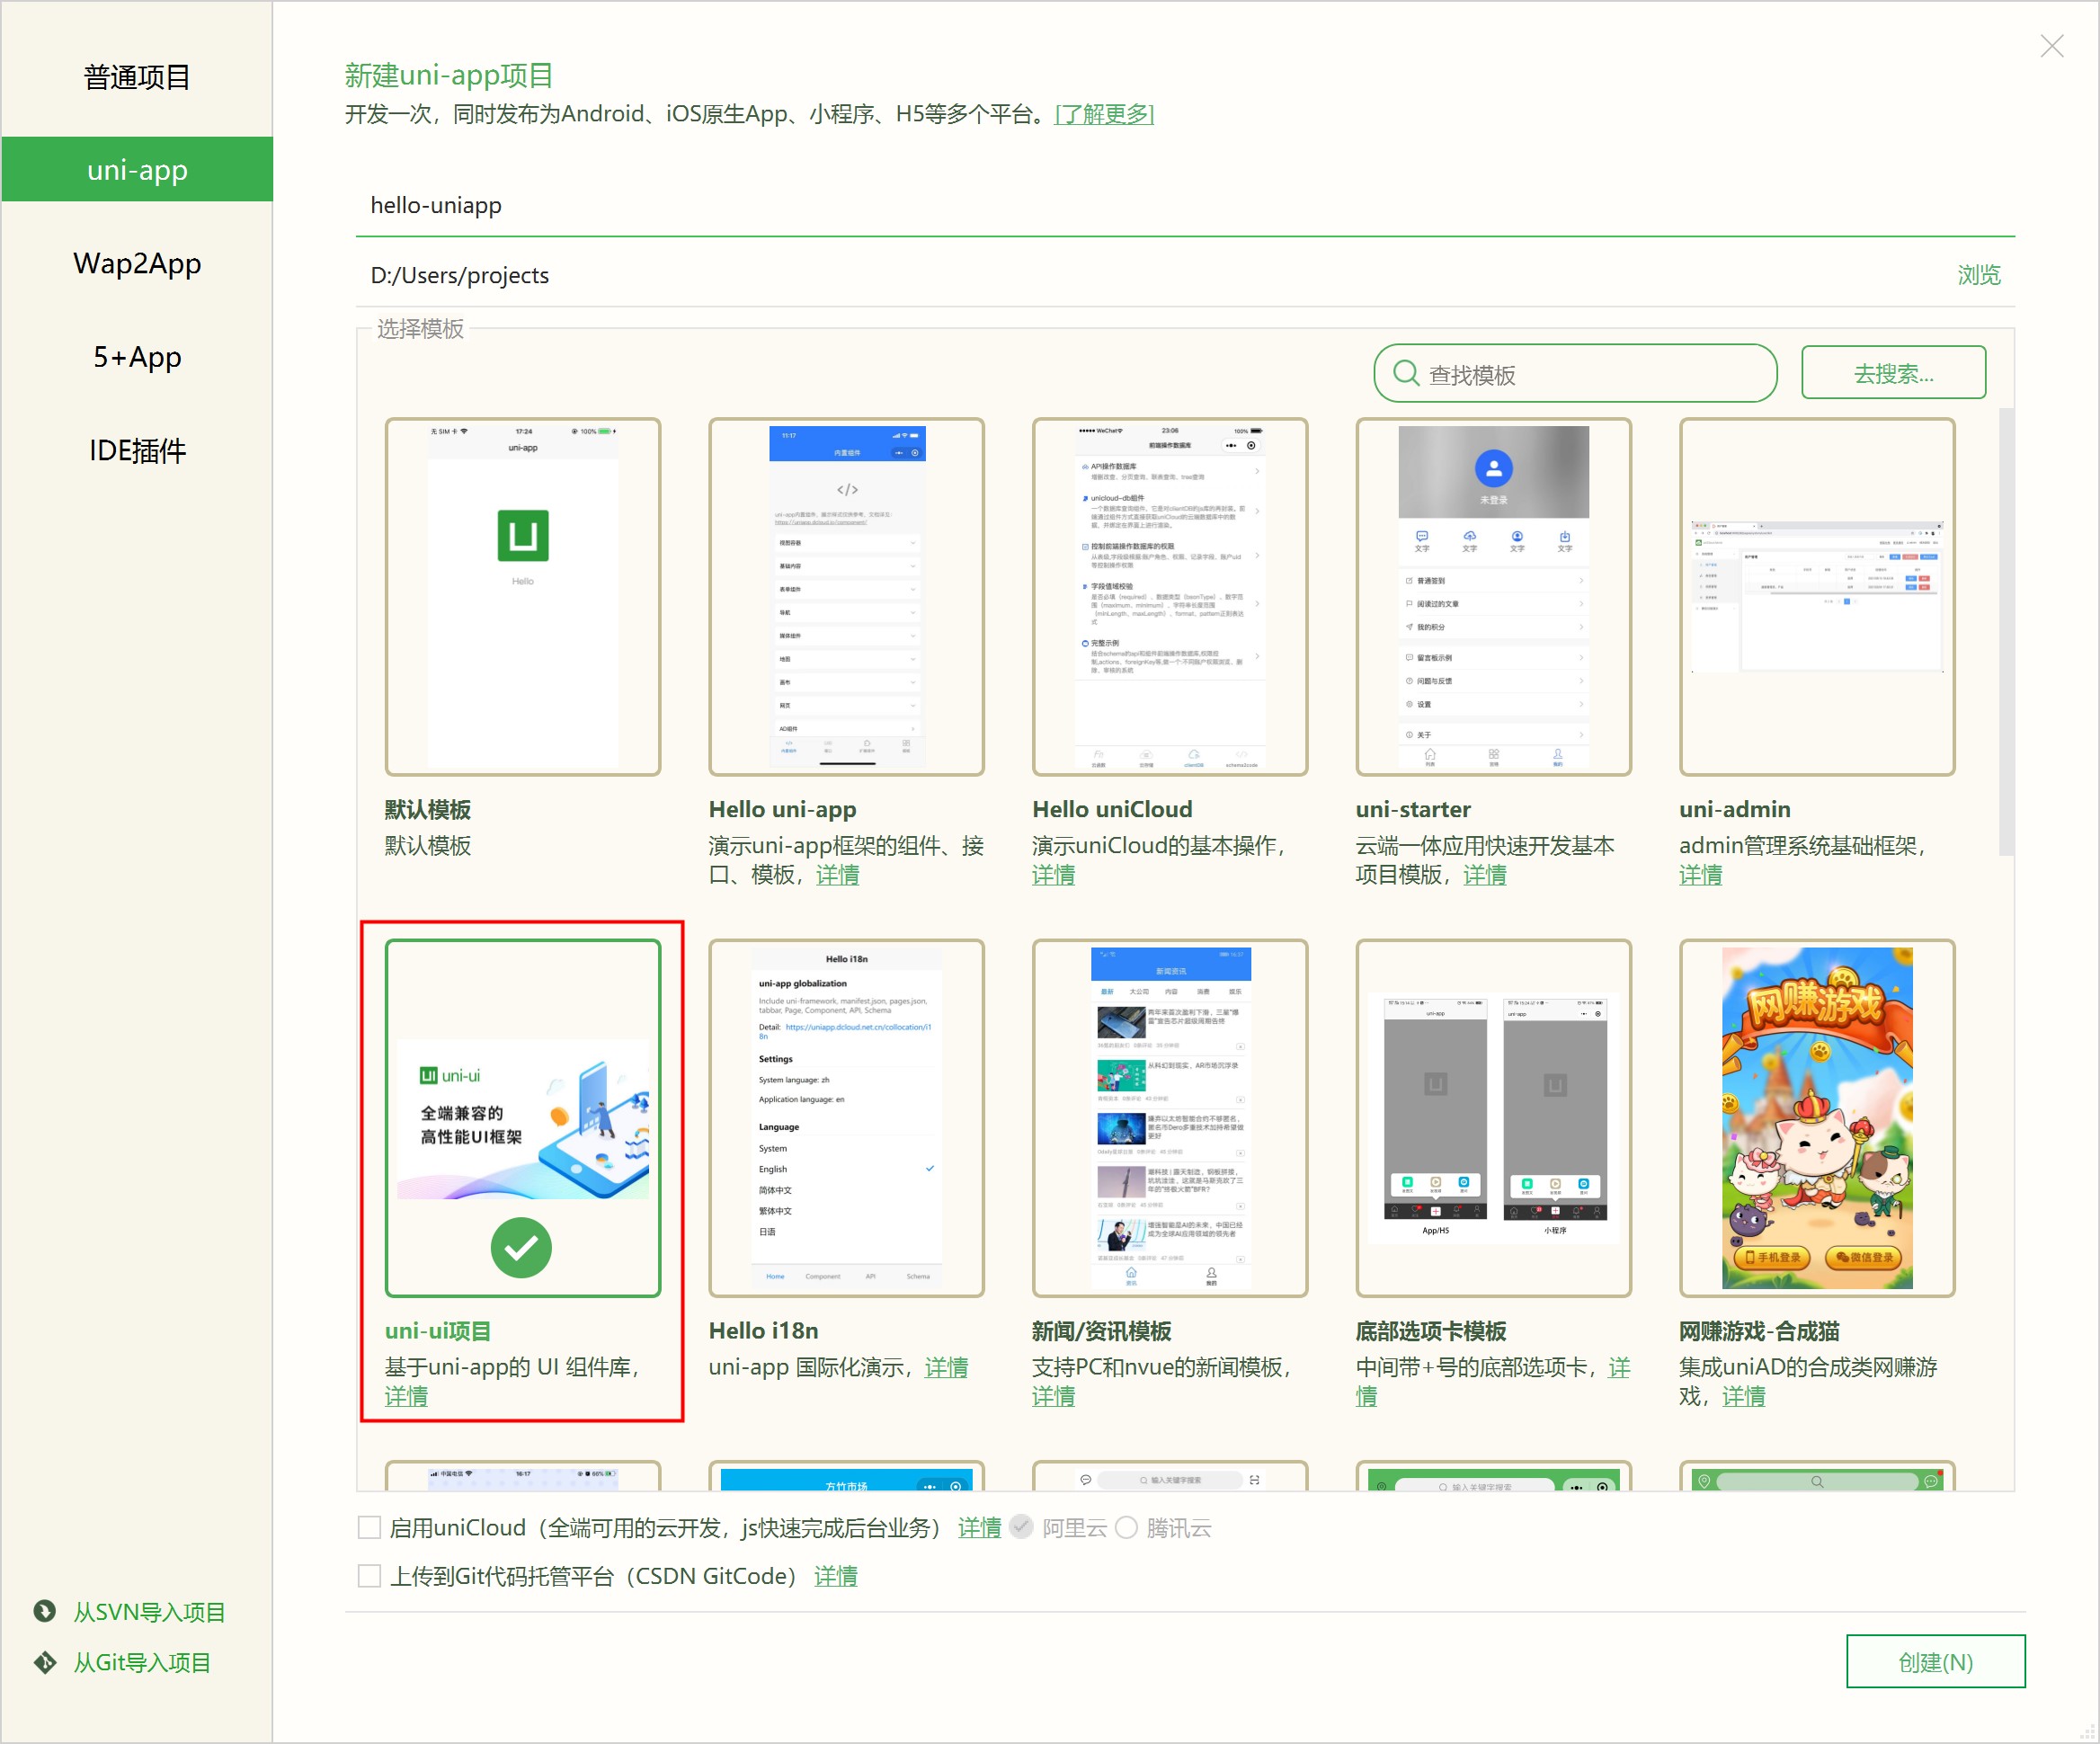
Select the type of uni-app, enter the project name, select the template, and click Create to successfully create it.
The templates that come with uni-app include the default empty project template, Hello uni-app official components and API examples, and an important template is the uni ui project template, which is recommended for daily development, and has built-in a large number of common components.
Developers can also use cli to create projects, see also documentation.
The difference is: the root directory of the project created by HBuilderX is the source code, which can be edited directly. The compiler of uni-app is in the plug-in directory of HBuilderX, and is upgraded along with the upgrade of HBuilderX.
If developers are accustomed to projects in node mode and are confused about the visualization method of HBuilderX, you can refer to the document separately: ## The difference between creating a project with cli and creating a project with the HBuilderX visual interface
# Run uni-app
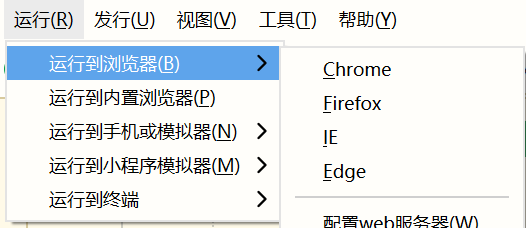
Browser operation: Enter the hello-uniapp project, click on the toolbar -> run to browser -> select a browser, and you can experience the web version of uni-app.
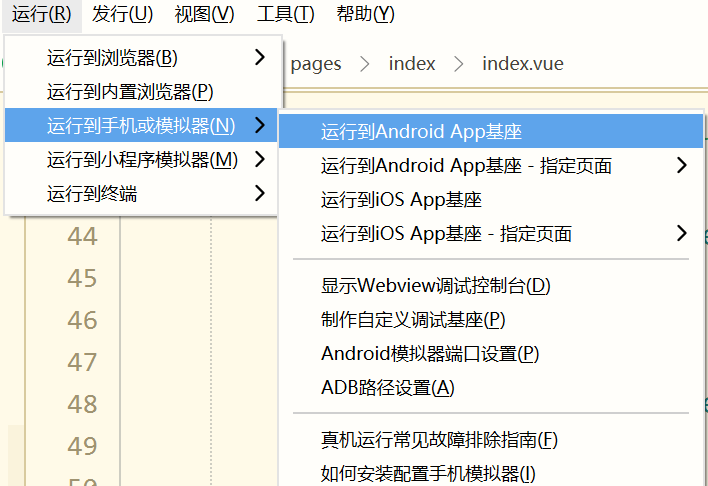
Run the App to the mobile phone or emulator: connect the mobile phone with a usb port with sufficient voltage, enable USB debugging in the settings, allow the computer device to debug the mobile phone on the mobile phone, enter the hello-uniapp project, click Run -> Run App to the mobile phone on the toolbar Or emulator, you can experience uni-app in the device.
- If the mobile phone or emulator cannot be recognized, please click Common Troubleshooting Guide.
- 如需运行在苹果手机真机上,注意需使用自定义基座。详见
The shortcut key to run is Ctrl+R.
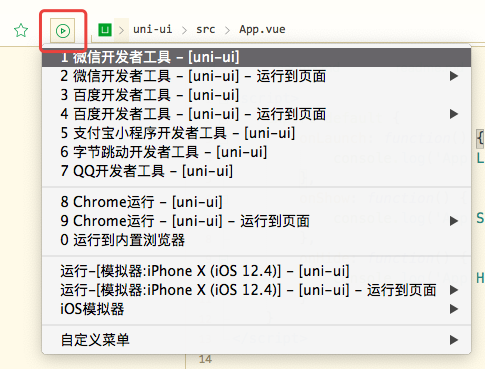
HBuilderX also provides a shortcut run menu, which allows quick selection for the equipment to run by pressing number keys:
For debugging, please refer to: uni-app debugging
# Release uni-app
# Package as a native app
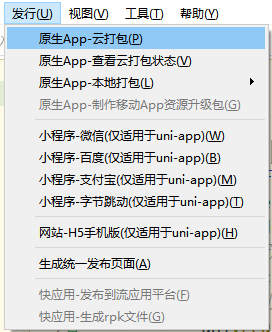
On the HBuilderX toolbar, click Release and select Native app - Cloud packaging, as shown in the figure below:
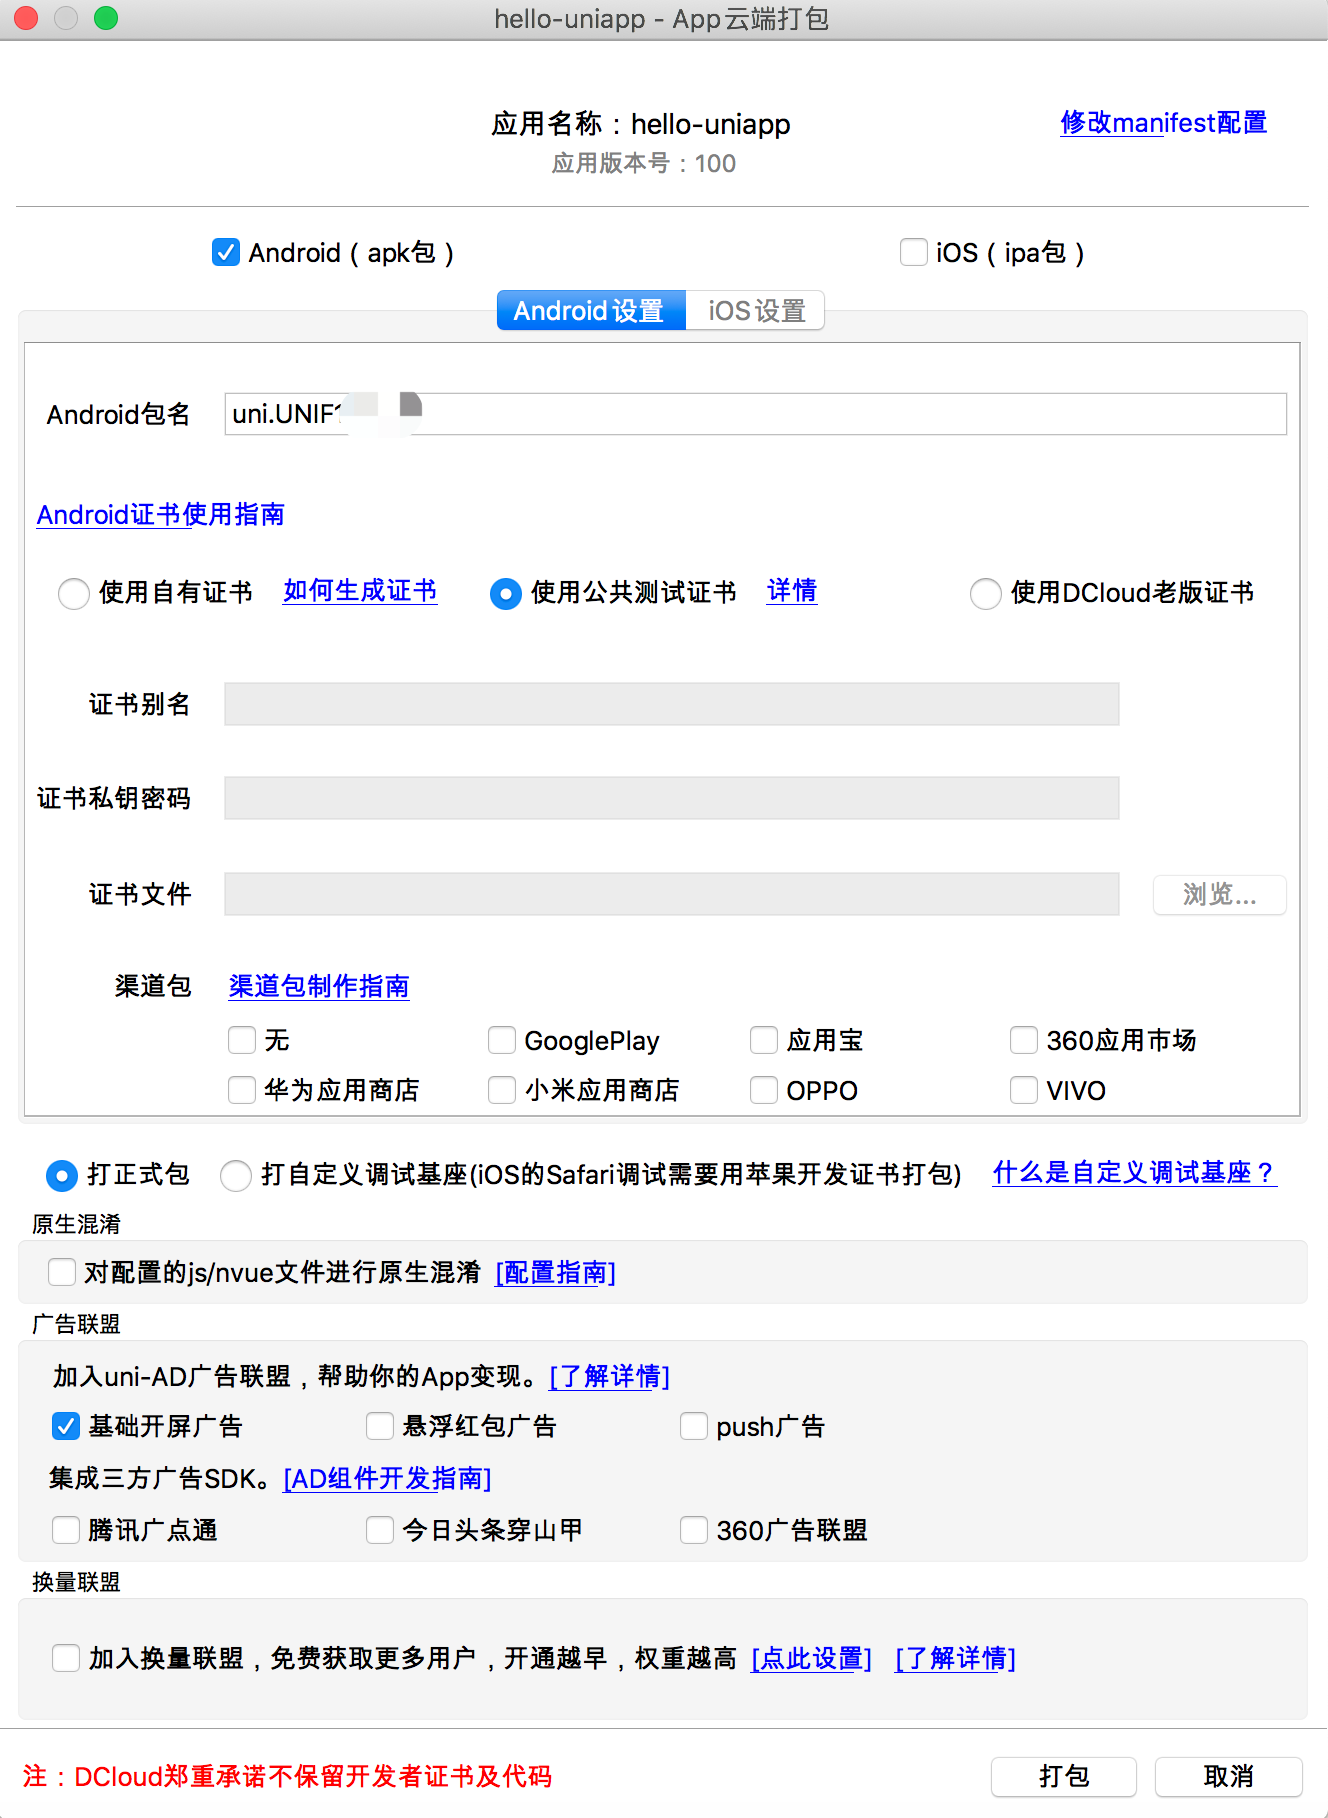
Cloud packaging supports Packaging At Ease, which protects user privacy without uploading codes and certificates. It achieves Packaging At Ease by differential package production. For details, please see: https://ask.dcloud.net.cn/article/37979
Cloud packaging also supports cli mode. The command line packaging can be called through the cli method of HBuilderX (not the cli of uni-app) to facilitate continuous integration. For details, please see: https://hx.dcloud.net.cn/cli/pack
Although peace of mind packaging has met the demand, if you still want to use xcode or Android studio for offline packaging, find the local packaging menu in HBuilderX release menu, generate offline packaging resources, and then proceed by referring to the offline packaging documentation: https://nativesupport.dcloud.net.cn/AppDocs/README.
When packaging the App, please note that if a third-party SDK is involved, you need to apply for it and configure it in manifest.json, otherwise the related functions cannot be used.
iOS App packaging requires a certificate from Apple.
# Publish as web site
- In the visual interface of
manifest.json, perform the following configuration (the application base path is not required when publishing in the root directory of the website). At this time, the publishing website path is www.xxx.com/h5, such as: https://hellouniapp.dcloud.net.cn.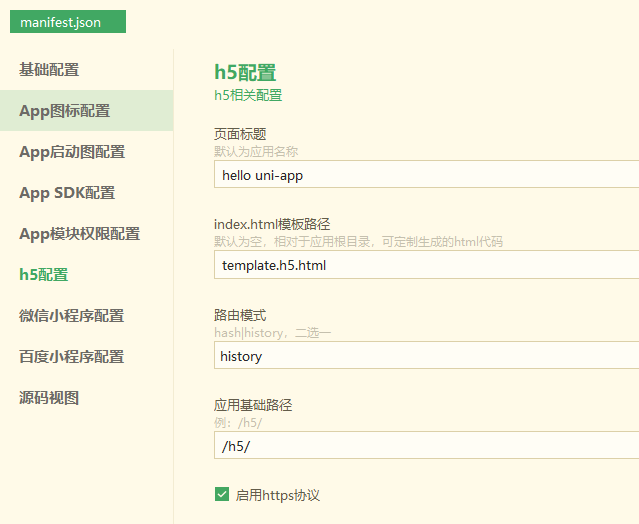
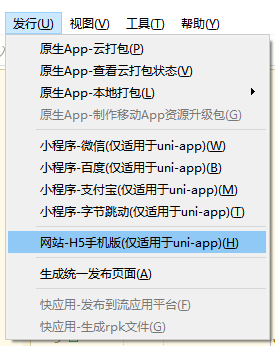
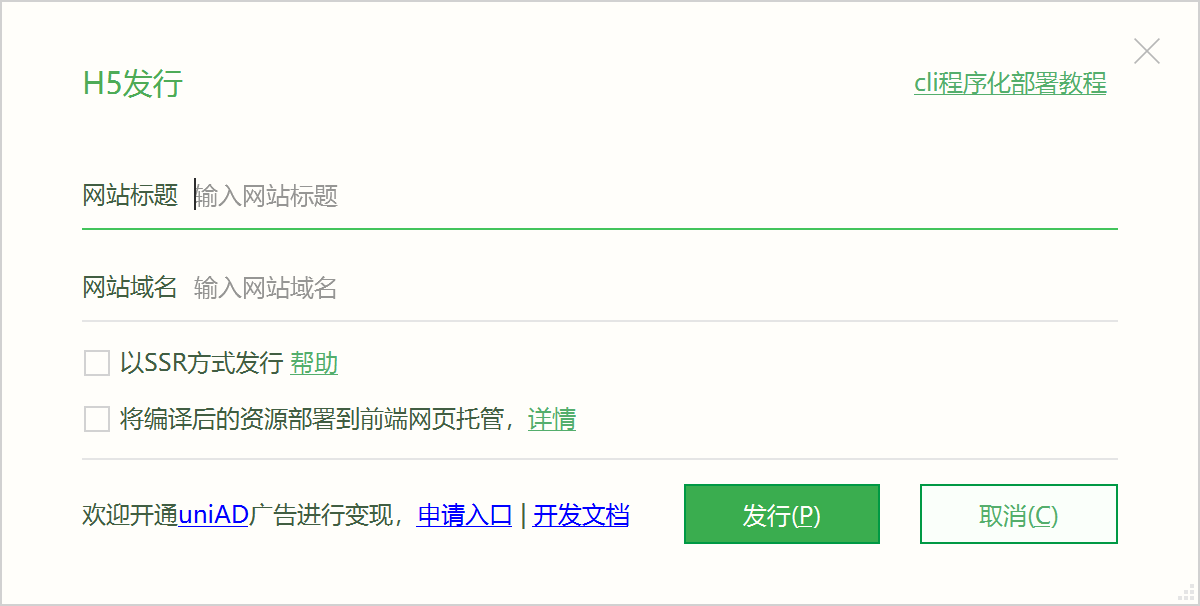
- On the toolbar of HBuilderX, click Release, and select the Website - H5 Mobile Version, as shown in the figure below. Click to generate the H5-related resource files and save them in unpackage directory.
Notice
history模式发行需要后台配置支持,详见:history 模式的后端配置- 打包后,推荐使用前端网页托管服务,一键上传,自带CDN加速,无需购买虚拟机,无需安装nginx等;
- If using traditional server deployment, it is recommended to enable
gzipcompression on the server side. Refer to the online sharing: https://juejin.im/post/5af003286fb9a07aac24611b
# Publish as applet
# Publish as a WeChat applet:
- To apply for a WeChat Mini Program AppID, refer to: [WeChat Tutorial](https://developers.weixin.qq.com/miniprogram/dev/framework/quickstart/getstart.html#%E7%94%B3%E8%AF% B7%E5%B8%90%E5%8F%B7).
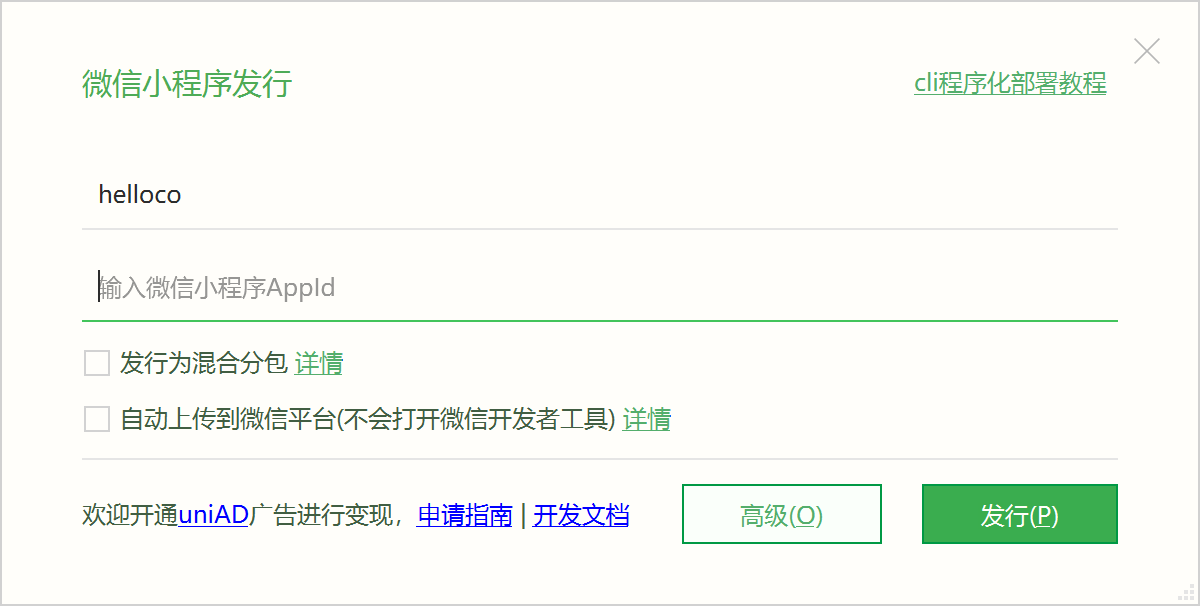
- Click "Release" => "Mini Program-WeChat" in the top menu of HBuilderX, enter the applet name and appid and click Release
If it is released manually, after clicking the release button, the WeChat applet project code will be generated in the project directory unpackage/dist/build/mp-weixin. In the WeChat applet developer tool, import the generated WeChat applet project, and after the test project code is running normally, click the "Upload" button, and then follow the "Submit for Review" => "Publish" applet standard process and operate step by step. , check in detail: [WeChat Official Tutorial](https://developers.weixin.qq.com/miniprogram/dev/framework/quickstart/release.html#%E5%8F%91%E5%B8%83%E4%B8 %8A%E7%BA%BF).
If Auto upload to WeChat platform is checked on the release interface, you do not need to open the WeChat tool for manual operation, and it will be uploaded directly to the WeChat server for review.
# Published as a Baidu applet:
- Enter the Mini Program and apply for the Baidu Mini Program AppID, refer to: Baidu Mini Program Tutorial.
- Click "Release" => "Mini Program-Baidu" in the top menu of HBuilderX, enter the applet name and appid and click Release to generate a Baidu applet in
/unpackage/dist/build/mp-baiduproject code.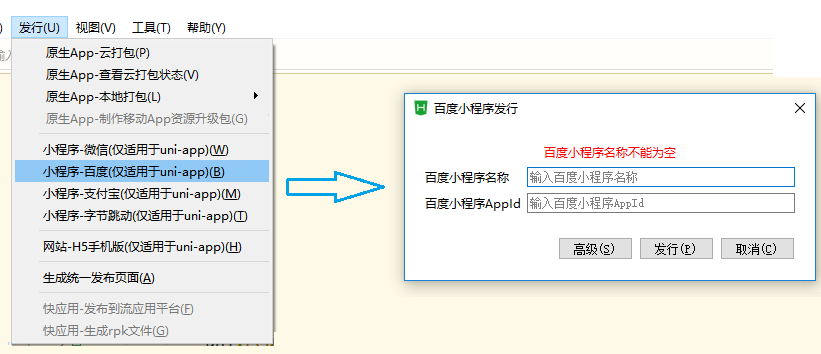
- In the Baidu applet developer tool, import the generated Baidu applet project, and after the test project code runs normally, click the "Upload" button to upload the code, and then upload the code in the Baidu applet's [Management Center](https://smartprogram .baidu.com/developer/applist.html) Select the created app and click Go to Publish, select the corresponding version and submit it for review.
# Published as an Alipay applet:
- Enter the Alipay applet, refer to: Alipay applet tutorial.
- Click "Issue" => "Mini Program-Alipay" in the top menu of HBuilderX, and you can generate the Alipay Mini Program project code in
/unpackage/dist/build/mp-alipay.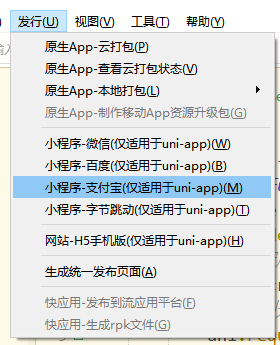
- In the Alipay applet developer tool, import the generated Alipay applet project, and after the test project code is running normally, click the "Upload" button to upload the code, and in the [Alipay applet background](https://open.alipay. com/platform/mini.htm#/app), select the version just submitted and click Submit for review, see: Alipay Mini Program Documentation.
# 发布为抖音小程序:
- 入驻抖音小程序,参考:抖音小程序教程。
- 在HBuilderX中顶部菜单依次点击 "发行" => "小程序-抖音",即可在
/unpackage/dist/build/mp-toutiao生成抖音小程序项目代码。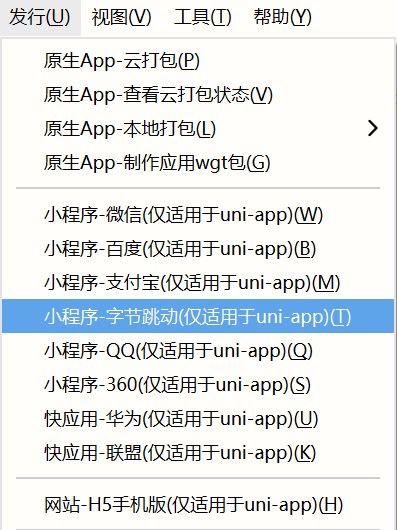
- 在抖音小程序开发者工具中,导入生成的抖音小程序项目,测试项目代码运行正常后,点击“上传”按钮上传代码,在 抖音小程序后台,选择刚提交的版本点击提交审核,详见:抖音小程序文档。
# 发布为360小程序:
- 入驻360小程序,参考:360小程序教程。
- 在HBuilderX中顶部菜单依次点击 "发行" => "小程序-360",即可在
/unpackage/dist/build/mp-360生成360小程序项目代码。
- 在360浏览器中,导入生成的360小程序项目
Notice
- Currently only supported on windows platform. 360 browser itself does not support the mac platform.
# Publish as a quick application (webview):
- Enter the Quick App (webview), refer to: Quick App (webview) Tutorial.
- Click "Release" => "Quick App Alliance" in the top menu of HBuilderX, and then you can generate the quick app (webview) project code in
/unpackage/dist/build/quickapp-webview.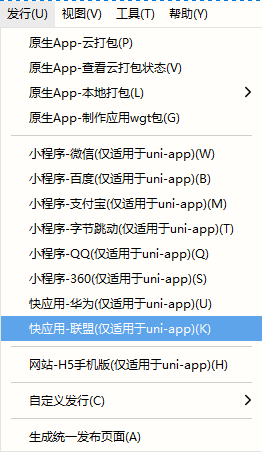
- In the Quick App Alliance tool, import the generated Quick App Alliance project, and after the test project code is running normally, click "Build" to package the official version, and in the Quick App Alliance background upload
# 发布为快应用(webview) - 华为:
- 入驻华为快应用,参考:华为快应用教程。
- 在HBuilderX中顶部菜单依次点击 "发行" => "快应用-华为",即可在
/unpackage/dist/build/quickapp-webview生成华为快应用项目代码。
- 在华为开发者工具中,导入生成的华为快应用项目,测试项目代码运行正常后,点击”构建“打包正式版,在华为快应用后台上传。
# 发布为QQ、快手、飞书、京东、小红书小程序:
The content is the same as above and will not be repeated.
# 发布为鸿蒙元服务:
- 注册鸿蒙元服务,参考: 元服务 appid 注册
- 请参考 元服务发行与上架 进行上架前准备。在 HBuilderX 中顶部菜单依次点击 发行 - 鸿蒙元服务,HBuilderX 会自动构建并上传到开发者后台,请点击控制台显示的链接进行操作。
The shortcut key released is Ctrl+u. You can also pull down the quick release menu and select by pressing number keys.